Wednesday, November 14, 2012

Creamy Cajun Chicken Pasta

This may be the best tasting pasta dish I have ever made!! No kidding!! It was so good! The flavors were amazing. It is a bit spicy and creamy and just the right balance of everything. And it is light! I am trying really hard not to make it again right now :) We all loved it and I found it on Pinterest from a blog, Skinny Taste. You HAVE to make this and then make it again because it is amazing!


Ingredients:

          8 ounces uncooked spaghetti
          1 pound chicken breast strips, thawed 
          1-2 tsp Cajun seasoning (or to taste)
          1 tbsp olive oil
          1 medium red bell pepper, thinly sliced
          1 medium yellow bell pepper, thinly sliced
          8 oz fresh mushrooms, sliced
          1/2 onion, sliced
          3 cloves garlic, minced
          2 medium tomatoes, diced
          1 cup fat free sodium chicken broth
          1/3 cup skim milk
          1 tbsp flour
          3 tbsp light cream cheese
          fresh cracked pepper
          2 scallions, chopped
          salt to taste
          Smart Balance cooking spray

Directions:

1. Cut and slice all your vegetables. My husband isn't a fan of peppers or mushrooms so I left them out. So ours was basically a lot of tomatoes and onions, but SO good!! Ok, next in a small blender make a smooth mixture by combining milk, flour and cream cheese. Set that aside. Season your chicken generously with Cajun seasoning, garlic powder and salt.

2. Prepare pasta in salted water according to package directions.

3. Heat a large heavy nonstick skillet over medium-high heat. Drizzle a bit of olive oil and add your chicken. Sauté 5 to 6 minutes or until done. Set  aside. I put mine on a plate and covered it in foil to keep warm.
4. Add olive oil to the skillet and reduce to medium; add bell peppers, onions, and garlic to skillet, sauté 3-4 minutes.
5. Add mushrooms and tomatoes and sauté 3-4 more minutes or until vegetables are tender. Season with 1/4 tsp salt, garlic powder and fresh cracked pepper to taste.

6. Reduce heat to medium-low; add chicken broth and pour in your creamy mixture, stirring about 2 minutes.

7. Return chicken to skillet; adjust salt and Cajun seasoning to taste and cook another minute or two until hot. Next add your pasta and toss well to coat. Top with chopped scallions and enjoy!

* great with salad and garlic bread or bread sticks!
* excellent leftovers too :)


Sunday, October 28, 2012

Baked Pumpkin Donuts

I made these on Saturday morning for a fun breakfast and they turned out great! I love my donut pan but you could definitely use a mini muffin tin to make little pumpkin poppers! I glazed them with a cinnamon glaze and then we dunked them in hot cocoa.... perfect for a cold fall morning! Enjoy!


Ingredients:

1 1/2 cups canned pumpkin
1/2 cup vegetable oil ( I was OUT of applesauce so I did use oil, but normally I would do 1/4 cup oil and 1/4 cup applesauce)
3/4 cup egg beaters
1 1/2 sugar
3/4 teaspoon cinnamon
1/4 teaspoon ginger
1/4 teaspoon nutmeg
1 1/2 teaspoon salt
1 1/2 teaspoon baking powder
1 3/4  cup + 2 tablespoons flour

Glaze
powered sugar
1/4 teaspoon vanilla
 milk
dash of cinnamon

1. Mix everything BUT the flour together until all combined. Next add in the flour and mix until smooth. Lightly grease your donut pan or mini muffin tin.
2. Fill about 3/4 full and bake the donuts for 15-18 minutes. Mini muffins will be done a bit sooner so check them at about 8 minutes. You will know they are done when a tooth pick comes out clean and they spring back when pressed.
3. Pop them out after about 5 minutes and let them cool on a cooling rack. While they are cooling you can make the glaze.
4. I don't have a perfectly measures glaze recipe. I always start with a 1/2 cup powdered sugar and add in the vanilla and cinnamon. Next I start with about 2 teaspoons of milk and give it a stir. Then I just add more milk of sugar depending on how thick I want the glaze. Easy peasy.
5. After they have cooled for a couple minutes just pick them up and dip them in to coat the top of the donuts. Just put them back on the cooking rack to let the extra glaze drip off. (I put a piece of wax paper under my cooling rack for easy clean up)
6. Next, you must make hot chocolate and dip these yummy donuts in and enjoy!

*found this yummy recipe on pinterest from King Arthur Flour

Wednesday, October 10, 2012

Creamy Chicken and Veggies

This was a great meal to have at the beginning of fall. It was warm and comforting. It is a crockpot meal, which I love. I love when dinner is ready whenever you want to sit down and eat!


 Ingredients:

4 chicken breast, thawed and halved
3 cups cubed potatoes
3 cups baby carrots
1 medium onion, chopped
2 packages McCormick Chicken Gravy Mix
1 cup water
1 teaspoon season salt
1 teaspoon thyme
1/4 teaspoon poultry seasoning
1/2 cup light or fat free sour cream

1. Place your potatoes, carrots and onions in a slow cooker. Top with your chicken, overlapping slightly if needed.
2. Mix your gravey mixes, water season salt, thyme and poultry seasoning in a bowl.
3. Cook for 8 hours on low or 4 hours on high or until the chicken is cooked through and veggies are soft and tender. I cooked mine on high and it was done in 4 hours.
4. Take your chicken and veggies and place them on a serving dish. Stir the sour cream into the drippings in your slow cooker with a whisk. Creamy gravey! Put your gravey into a dish and put on the table to pour over your chicken and veggies.
5. Serve with rolls or muffins and enjoy!

Thursday, September 27, 2012

Egg and Sausage Breakfast Pockets

This dinner was a hit. Just yesterday at dinner, eating something completely different, my 5 year old daughter asked me when were were going to have breakfast pockets again. When she asks questions like that, I know I have done something right!

These are a really easy weeknight meal or a fun Saturday breakfast. I love that all the yumminess is on the inside so even little hands can hold these. Nice and warm from the oven, you have to try these!


Ingredients:

3 cups Heart Healthy Bisquick
1 cup fat free/low fat milk
6 eggs, beaten, scrambled and cooked
salt and pepper (for eggs)
1/2 lb. turkey sausage, crumbled and cooked
grated cheese, mozzarella, cheddar, or pepper jack

1. This is nice and easy. First, mix up your bisquick and milk. Once it has formed a dough, plop it onto a floured counter and  roll out into a nice big rectangle. Make sure your surface is good and floured because you don't want these sticking when you are trying to assemble them. You want your dough to be fairly thin. If not when they cook up you will have a TON of biscuit and not enough filling. They puff up :)
 2. Next, you are going to cut your dough into smaller rectangles. About 4x6 inches. You should be able to make 8-9 pockets. Now you are going to fill them. Add a bit of cheese, sausage, and egg right to the middle of your rectangle. You are now going to bring up all the edges and sides and pinch them in the center. Keep your fingers floured so you don't have a sticky mess, too. Flip it over and place it on a greased cookie sheet. It is ok if they don't look beautiful, they will once they are cooked.
3. Assemble the rest of your pockets and put them in a 450 degree oven for about 10-12 minutes, until the tops are golden brown.
4. My family loves dipping them in ketchup but they are great on their own. Add a fruit salad and smoothies and you have dinner.... or breakfast!

* it would be great to make a batch and keep them wrapped in the freezer for a quick breakfast too!

Monday, September 17, 2012

(Light) New York Cheesecake

Cheesecake sounded really good so I whipped one up this past weekend. My husband and I love cheesecake. This recipe is very easy and light too! Believe me you can't tell. My husband said this my be the best cheesecake I have ever made! There is a hit of lemon and combined with the creamy cake, it pairs up perfectly. Add a bit of raspberry sauce on top and it is heaven. Believe me. So. Good.


Ingredients:

3/4 cup graham cracker crumbs
2 tablespoons margarine, melted
2 tablespoons sugar
5 packages of reduced fat cream cheese, soft (room temp)
1 3/4 cup sugar
1/4 cup flour
1 tablespoon grated lemon peel
1/4 teaspoon salt
1 1/4 egg beaters
2 egg yolks

Raspberry sauce:

1 package frozen raspberries
3-4 tablespoons sugar
1 teaspoon corn starch

1. In a small bowl mix the graham cracker crumbs, sugar, and the melted butter together. Press into the bottom of a 9 inch springform pan.
2.In a large bowl or mixer beat cream cheese, 1 3/4 cup sugar, the flour, lemon peel and the salt until smooth. Beat in the egg beaters and yolks until well blended. Pour over the graham cracker crust.
3. Bake at 425 for 15 minutes.
4. Reduce the heat to 250 and bake for an hour longer. ( I kept mine in for another 30 minutes because the center wasn't done, but every oven is a bit different) The center will become firm after it has time to cool. Turn off the oven and leave the cheesecake in the warm oven for another 30 minutes. Next remove from oven and cool on a wire rack for 30 minutes.
5. I know it seems like a lot of cooling steps but believe me it is worth it! Ok, next carefully run a knife around the side of the cheesecake to loosen the sides. Put it in the fridge uncovered for 3 hours. After the cake has cooled cover it and refrigerate another 9 hours to firm up. I always make mine in the evening and let it cool over night. Then it is ready the next day. You could always make it in the morning and have it for dessert that evening.
6. Run a knife around edges again and carefully remove the side of the pan. Top with raspberry or chocolate sauce.

Sauce:

1. Dump your whole bag of raspberries into a saucepan and bring them to a simmer. When they are nice and soft add your sugar. Taste and add more sugar to your liking. Now, I strain my sauce to take out all the seeds because my hubby doesn't like having seeds in his teeth. So if you want to strain them out, now is the time. Use a mesh strainer and strain all the berries into a bowl so the sauce is smooth. Put the sauce back into the sauce pan and bring it to a simmer. Combine your cornstarch with about a 1/2 teaspoon of water and add it to the sauce. Bring it to a boil and stir until your sauce has thickened. Let it cool and drizzle over your cheesecake!

Thursday, July 26, 2012

Grilled Chicken and Peaches with Green Beans and Orzo

This was the BEST summer dish! So good. We all loved it. Even the company that we had over. One of the firefighters that my husband works with came over and for some reason I always try out new recipes on company, hoping it will turn out...and it did! I can't wait to have this again. Yum. It was super fast to put together and the fresh summer ingredients really made this meal!

2 cups dried orzo
2 1/2  fresh green beans
1 lb. chicken tenders
2-3 peaches, cut in wedges
dried thyme
salt and pepper
olive oil
1/3 cup fresh grated Parmesan cheese

1. In a large pot, bring 5 cups of water to a boil (I added a couple chicken bouillon cubes for more flavor). Toss your orzo in and cook for 8-10 minutes. During the last 5 minutes of cooking add in your green beans to cook them. Don't drain until I tell you to :)
2. While your pasta is cooking, brush your chicken with a bit of olive oil and sprinkle both sides with dried thyme, salt and pepper. Also brush your peaches with a little oil. You do NOT want your peaches to stick to the grill. That is bad. Put your chicken and peaches on the grill and cook about 4 minutes a side on medium/high heat. You want those pretty grill marks on your peaches too. I actually didn't flip my peaches. I just let them heat through on one side and the marks were there without having to fiddle with them and it turned out perfect.
3. When your chicken is done and your pasta is done drain your pasta and beans and then return them to the pot. Grate fresh Parmesan cheese right in there and sprinkle some salt and pepper too. Toss that all together. Taste and see if you need more seasoning. Then plate by giving a nice mound of pasta and beans topped with sliced chicken and peach wedges. SO. GOOD. Enjoy!

* Add some muffins and you are set!

Sunday, July 15, 2012

Pesto Tortellini

This is a great fresh summer dish.  Only three ingredients! It is light, meat free, and you can't beat the clean herb flavor. This comes together quick with fresh pasta tortellini and is one of my favorite pasta dishes. Just add a colorful fruit salad and fresh tomatoes on the side and dinner is served!


Ingredients:

16 oz. package of fresh cheese filled tortellini (it is in the refrigerated section by the cheese)
1 package of Knnor brand pesto (it comes in a package by packaged taco seasoning and it is a dry mixture)
fresh Parmesan cheese

1. See, only three ingredients but tons of flavor. Ok, so first get your pasta cooking. Bring a pot of water to a boil and cook pasta according to package directions. Probably around 9-11 minutes. While the pasta is cooking make your pesto.
2. About pesto. You can certainly buy a container of already made pesto at your grocery store but I just make my own to control the fat and calorie content.
3.  I stray away from the back of the package directions. I pour the dry pesto into a small sauce pan. Then I add 2 tablespoons of low-fat Italian dressing (you can also use olive oil too). I turn the heat to medium and then add water a little bit at a time and stir your sauce using a whisk. By adding water a little bit at a time you can decided how thick or thin you want your sauce. So add water until you reach the consistency you like. Pesto has a strong but good herb flavor so it won't look like a lot but it will be....... don't worry :)
4. Before your drain your pasta, dip a measuring cup in the pasta water to save some of starchy water for later. Ok, now drain your pasta and return it back to the pot is was cooking. Now, pour your pesto over your tortellini and toss to coat. If your pasta seems a bit dry, just add a splash of the starchy pasta water.
5. Plate your pasta and grate fresh Parmesan cheese right on top.

Thursday, June 21, 2012

No Bake Candy Bars

I made these up one night with my girls because we were craving something sweet! They turned out sooooo good! They are sweet, salty, and crunchy. They are perfect for summer because there is no oven required. All of these ingredients you might even have in your kitchen, so whip some up tonight!


Ingredients:

graham crackers
25 caramels
2 tablespoons milk
mini marshmallows
pretzels, broken into small pieces
chocolate chips (I did a heaping cup)

1. This is a really easy treat. Start by lining your 8x8 pan with a piece of foil. Next make a layer of graham crackers to fit the bottom of your pan. I trimmed a couple of pieces with a serrated knife to make a perfect fit.
2. Unwrap all your caramels and put them in a microwave safe bowl. Add 2 tablespoon of milk and pop it in the microwave. Start with 30 seconds and give it a stir. Continue with 30 seconds at a time and stirring until it is smooth and creamy.
3. Pour HALF of the caramel over the crackers. Just drizzle it over. I doesn't have to be perfect, you are going to put lots of good stuff on top of it. Next, pour an even layer of mini marshmallows on the caramels. Kinda press them into the caramel. Yum. Ok next.
4. Pour (or drizzle for better coverage) the rest of the caramel over the marshmallows. Sprinkle an even layer of pretzels on top of the caramel and press them in too. Next and last.... melt the chocolate chips in a bowl (30 seconds at a time again until smooth) and pour the chocolate on top of the pretzels. Smooth out with a knife and set in the fridge until set.
5. When they are set, pull the foil out and cut into bars.

Thursday, June 14, 2012

Garlic Knots


We all know that I have an obsession with bread. Anything bread I love! I love making bread. I make fresh bread for my family a few times a week so we can have toast and sandwiches. Now my kids love bread. It is a vicious cycle really. But is it oh so good.

I also love making rolls, bread sticks, and tortillas for dinner. So these garlic knots were perfect for our pasta dinner the other night.

Now, this is a bread machine recipe. I love my bread machine. But I have a confession.....I use it only for dough making. It does all the work and makes no mess. I just dump everything in and in an hour my dough is ready for rising. Wonderful! Now if you don't have a bread machine then just use your favorite roll dough recipe or frozen rolls. Easy peasy.


Ingredients:

2 tablespoons soft butter
1 cup warm water
1 beaten egg
1/4 cup sugar
3 1/4 cup flour
1 teaspoon salt
3 teaspoons yeast
melted butter
garlic granules

1. Start by putting your soft butter in the bottom of the bread maker pan. In a measuring cup, beat your egg and add a little bit of the warm water while mixing. This will temper the egg. Add the rest of your water to the egg and add both to the pan.
2. Next, add your flour. I do a combination of all purpose and whole wheat but you can do whatever you like :) Just make sure it equals 3 1/4 cup. Add the sugar right on top. Then add salt and yeast. Pop in into your bread maker and press the DOUGH setting.
3. When it has finished rising in the pan, remove from pan and punch down. Roll it out and cut into strips. At this point if you are using your own dough or a frozen (now defrosted) do the same. Tie the strips into knots and place on a greased cookie sheet. Do the same for all your dough strips. Let rise for about 30 minutes.
4. Bake at 365 degrees for10-12 minutes until light golden brown. As soon as these come out of the oven brush them with butter ( I used melted tub butter) and sprinkle with garlic granules. Eat and enjoy!

Wednesday, June 6, 2012

Sweet Potato Casserole with Toasted Marshmallows

I know this may seem like a fall side dish, but this is my families favorite way to eat sweet potatoes. My kids gobble this up.....and then ask for seconds. It makes me so happy. There are like a million different versions of this dish out there but I have experimented and tweaked my own to make it perfect with a lot less sugar and fat in it. Tonight at dinner my husband told me that I got the proportions perfect.

Boo ya.

So, try it and I know you will love it!


Ingredients:

4 medium sweet potatoes (yams)
2 tablespoons tub butter (I use Brummel and Brown)
1/2 teaspoon salt
1/4 teaspoon cinnamon
3 tablespoons brown sugar
marshmallows
coconut

1. First poke all your potatoes with a fork and pop them into the microwave. I have a "baked potato" setting that I just push and let my microwave do all the work. But, if your microwave doesn't have that setting, just cook them on high for 5 minutes. Test them to see if they are soft all the way through. If the are still hard, just add on a minute at a time until they are done. I usually do this a couple hours ahead of time so they have time to cool. It is NOT fun to peel the skin off of a burning hot potato.
2. After your potatoes have cooled, peel them and put them into a bowl. Use a potato masher and mash them until they are creamy. Next add in your butter, salt, cinnamon, and brown sugar. Mix it all together and scoop into a casserole dish.
3. Preheat your oven to 425. Right before you put your dish in the oven, sprinkle some marshmallows and coconut right on top. As much as you want :)
4. Bake for 15 minutes until warm. Then broil for just a minute or 2 until your marshmallows and coconut are golden brown. Eat and enjoy!

* This can be made a couple of hours ahead of time and kept in the fridge.


Tuesday, May 22, 2012

Banana Bread Cookies

My mom used to make these cookies for me when I was a kid. When I would have sleepovers she would make a big batch and all us girls would snack on them all night. They are a healthy cookie so I don't feel bad letting my kids have 2-3 :) They really taste like little banana bread bites, so good!


Ingredients:

1 1/4 cup sugar
2/3 cup applesauce
2 tablespoons vegetable oil
1/2 cup egg beaters or 3 egg whites
1 cup mashed bananas (about 3)
1 teaspoon vanilla
3 cups flour
 2 teaspoons baking powder
1/2 teaspoon baking soda
1/2 teaspoon salt
cinnamon and sugar mix

1. Mix sugar, applesauce, oil, eggs, banana, and vanilla. Add in the flour, baking soda, baking powder, and salt. Mix until all combined. The dough will be super soft. Kinda like banana bread. Put the whole bowl in the fridge for 30 minutes. Or be like me and stick it in the freezer for 15 minutes so you can eat them sooner :)
2. After they have been chilled preheat your oven to 400 and use a cookie scoop and scoop out 12 per cookie sheet. Sprinkle the tops with cinnamon sugar and bake for 8 minutes. As soon as they are done remove them and place on cooling racks. Then EAT! They are nice and fluffy. So good! Now you could add chocolate chips, walnuts, or a sweet glaze.

Nice and fluffy

                         Really cute babies like snacking on them, yum!

Wednesday, May 16, 2012

Italian Grilled Cheese

This is a really yummy way to make grilled cheese. There are so many variations for this sandwhich but I LOVE this flavor combonation. This dinner is simple but very satisfing!


Ingredients:  (make for as many sandwichies as you like!)

bread (homemade if possible, so good!)
sliced mozzeralla cheese
sliced tomato
fresh chopped basil

1.  I use homemade bread for this dinner. The bread is so fluffy and gives this sandwhich such great flavor. But a great storebought sourdough would be delicous. Just butter both outsides of your bread and place cheese on the inside. Sprinkle with basil and put it on the hot pan. Give it a few minutes and flip it!

Now we do this a bit different. I grill the sandwhich with just cheese first. As SOON as I take the sandwhich off the heat, I quickly open the sandwhich and place the tomoato slices on one side of the bread and then close it.  This way there is cheese on both sides and you don't have tomaotes falling out when you flip it.

2. So easy! Add some fruit and veggies and dinner is served!

Monday, May 7, 2012

Mandarin Chicken Salad with Poppy Seed Dressing

You might know that I love salads. Love them. Thank goodness my husband does too so.... we religiously have salad night every Friday. I look forward to this night. That might seem weird but it is true. I love when the weather warms up and there is lots of yummy fruits and veggies available and that means delicious salads will be created. This salad is fresh and crisp! I found a recipe and tweaked it a bit and it is perfect. The dressing really adds tons of flavor. Add toasted and buttered ciabatta or french bread and dinner is served!


Ingredients: (this made 2 adult size dinner salads)
 
1/2-1 head Romaine lettuce, chopped
1/2 thinly sliced medium red onion (optional, my husband isn't a huge fan of raw onion)
1 large avocado, cubed
4-6 pieces of turkey bacon, cooked and chopped
1 large can Mandarin oranges, drained
4 chicken breast tenders or 2 chicken breasts, thawed
salt
pepper
garlic granules
 
Dressing:
1/3 cup white vinegar
1 teaspoon Kosher salt
A few turns of freshly ground black pepper
3/4 cup sugar
1 teaspoon spicy mustard
1 green onion, chopped
1/4 cup fat free Italian dressing
1 teaspoon poppy seeds
 
1. Put your lettuce on your plates. As much as you like. We like big salads for dinner so we put a good amount of lettuce on our plates. Right on top add your onion, avocado, turkey bacon and oranges. Next it is time to cook your chicken.
2. Season your chicken with salt, pepper and garlic granules. Cook in a skillet or on the grill until done. Let cool for a few minutes so when your cut into it, the chicken will still be juicy. Slice and top your salad with the chicken.
3. Ok, dressing time. This is really easy and quick because you toss it all in the blender! Combine vinegar, salt, pepper, sugar, and mustard in your blender. Blend. While the blender is running, add the green onion. Continue running the blender and add the Italian dressing in a steady stream until it is fully incorporated into the dressing. Pour into a serving container and stir in your poppy seeds. Top each salad with as much dressing as you like.
Enjoy a yummy spring salad.
 
adapted from our best bites

Monday, April 30, 2012

Spicy Taco Braid

I have made this a couple of times and it is a hit every time. Everyone loves it. We even tried it out on company! Warm bread filled with spicy taco fixings... really nothing is better. The braid makes for a fun presentation and you can cut as much or as little as you want. Just use your favorite bread recipe, store bought dough, or even frozen bread dough. It is really easy too!
                                
Ingredients:
1 recipe for bread (homemade, store bought, or frozen)
4 oz of low fat Cream Cheese, softened
1/2 cup Salsa
1 lb ground turkey, cooked and seasoned with a taco seasoning packet
1 can (15oz) of black beans (drained)
1 cup of colby cheese, grated
olive oil
garlic salt
sour cream
cilantro

1. Roll dough into a 15-in. x 12-in. rectangle on a floured surface. Carefully place your dough on a greased cookie sheet. It's very important to place the dough on the cookie sheet before you fill it because once you fill it, it will be too heavy to move onto the cookie sheet. :)  Mix salsa and cream cheese in a small bowl until smooth.  I take a knife and gently score my dough, dividing it into thirds length wise. This was I know where all the filling is supposed to go and the outer edges are ready to be cut and braided. Ok, spread the cream cheese and salsa mixture down the center. Then top it with the seasoned meat and black beans. Sprinkle with cheese.

2.On each long side, cut 1 inch wide strips about 2-1/2-inches into center. I use my clean kitchen scissors. It makes it super easy. Starting at one end, fold alternating strips at an angle across filling.

3. Pinch ends to seal and tuck under. Brush with olive oil and sprinkle with garlic salt. Don't worry about what it looks like. After rising for a few minutes and cooking it..... it will look beautiful! 

4. Next, cover and let rise for 20 minutes. I just let it sit in the oven that I turned on for a few minutes, then turned off. Just warm....not hot.

5. Bake at 400 degrees for 20 minutes. After 20 minutes, cover with a big piece of foil and cook for another 10 minutes.

6. Remove from oven and lightly spray with butter flavored non-stick spray. Ok, that may seem weird and gross, but it's not! This is my secret to soft bread right out of the oven. So lightly spray it and put the foil back over it while it cools for a few minutes. You will have soft, fluffy bread. promise!Transfer your braid to cutting board with 2 spatulas and cut of big pieces of delishisness! I
* Serve this with a green salad, sour cream and guacamole.

The finished braid. Before cutting into it. You see that baby eyeballing dinner? So good.

                                 Ready to eat! Look at that gooey cheese!

Wednesday, April 25, 2012

Cowboy Coffee Cake

This is the coffee cake that my mom used to make me and my little friends every time I had a sleepover growing up. Now I make it all the time! It is my go-to coffee cake recipe and we love it. It goes great with eggs and fruit salad and I make it to complement our dinner meals too! Very versatile and super yummy!

Ingredients:
1/4 cup applesauce
1/4 cup egg beaters or 2 egg whites
1/2 cup fat free milk
1 1/2 cups flour
3/4 cup sugar
2 teaspoon baking powder
1/2 teaspoon salt

filling and topping:
1/2 cup brown sugar
2 tablespoons flour
2 teaspoons cinnamon
2 tablespoons tub butter, melted
walnuts (if you want)

glaze: powdered sugar
milk

1. Oven to 375. Combine the applesauce, eggs, and milk in a large bowl. In a medium bowl mix together the flour, sugar, baking powder and salt. Add the dry ingredients to the wet ingredients and mix until everything is combined.

2. Next, mix up your filling and topping ingredients. Just stir them all up in a bowl then pour it into a zip lock sandwich bag.

3. Ok, pour half of your batter into a greased 9x9 baking dish. Then snip off one corner of your zip lock bag and drizzle HALF of the filling on top of the batter. Then pour the rest of the batter on top and drizzle the rest of the topping onto the top of your cake. If you like walnuts....add them now! Right on top!
4. Bake or 20-25 minutes until the cake is cooked through. While it is baking make a quick glaze by mixing 1/2 cup powdered sugar with a couple of teaspoons of milk. Just find the consistency you like by adding more milk to thin it out or more powdered sugar to thicken it up.
5. When your cake comes out of the oven let it cool for a couple of minutes then drizzle your glaze on top. I poured my glaze into a zip lock bag also and drizzled it on top. Super easy and less messy! Serve this with breakfast items like eggs, sausage, omelets, fruit salad.....or dinner!

Before you dig in......

Wednesday, April 11, 2012

Steak Tacos with Pineapple Corn Salsa

We don't' eat a lot of red meat around here. I guess it is because growing up we NEVER had red meat. My mom was a vegetarian and so we mostly ate chicken and ground turkey with our meals, which just so happen to be my favorites now. But every once and a while I get a little wild and cook beef for my family. I know, crazy stuff. Well, this recipe was given to me by my WONDERFUL sister and it was so good! I love that it is also a slow cooker meal so little effort has to go into this. Start it in the morning and by dinner time you are set! Yum, tacos!


Ingredients:

1-1 1/2 lb. flank steak
1 fresh pineapple, chopped (bite size) and divided
1 red onion, chopped and divided
1 tablespoon chili powder
1 jalapeno, seeded and diced
2 tablespoons lime juice
1 avocado, pitted and diced
1/2 cup chopped cilantro
1 can corn, drained
salt and pepper
flour tortillas

1. Ok. Start this baby in the morning....like 10-11 am so by dinner time it is done! Cut your massive piece of meat into four chunks. This way it will fit better into your slow cooker. Into the crock pot : cut steak, 3/4 of your chopped onion (save the last 1/4 for the salsa) 1/2 of the chopped pineapple, chili powder, and then sprinkle in some salt and pepper. Set to low and allow it to just hang out for 7-8 hours.
2. About 1/2 hour before you want to eat take two forks and shred your meat right in the crock pot. Time to make salsa. Combine your left over onion and pineapple, chopped cilantro, corn, lime juice, and jalapeno. Toss that all together and set aside. Don't add the avocado just yet. Wait and add that in right before serving so you don't have a brown avocado. Not attractive....
3.To assemble simply take a nice warm tortilla (homemade are amazing here) fill full of warm shredded steak and top with your cool salsa. Then dig in and enjoy every tasty bite!

* I added tomato too!

Monday, April 2, 2012

Chicken Stuffed Avocado

This was a great, healthy, quick meal I know we will have again! All the flavors mixed together were amazing. I love avocados. Fill them with creamy chicken salad and you have a meal!

At dinner I was eating my meal and I look up at my husband and his food was GONE. He looked and me and I smiled and then he said.... "what? They were really good." That makes me one happy cook. Empty plates and happy bellies!


Ingredients: (makes 2 adult portions)

2 cooked chickens breast, cooled and shredded
*(I seasoned mine with salt, pepper, garlic powder and Italian seasoning and grilled them while I assembled the rest of the salad)
1/2 cup corn
1/2 cup black beans
1/4 cup chopped green onions
1/4 cup chopped cilantro
1/2 cup chopped tomatoes
1/4 cup crushed tortilla chips
4 tablespoons low fat mayo
2 tablespoons white vinegar
salt and pepper to taste
2 avocados, halved and pits removed

1. Super easy here. Cook up your chicken. I grilled mine. I love the flavor of grilled chicken. A rotisserie chicken would work great here too.
2. In a bowl combine corn, black beans, green onion, cilantro, tomatoes, and tortilla chips. Toss to combine. In another smaller bowl whisk together the mayo and vinegar. Add salt and pepper. Taste and adjust to your liking.
3. When your chicken is done, toss it in with the veggies and pour your dressing over the top of it all. Mix and top your avocados with a mound of chicken salad. Just dig right into your avocado with a spoon or fork, it's fun too.
4. Serve this with some fruit and some warm bread. (we had flat bread, yum!)

recipe adapted from Cheeky Kitchen

Monday, March 19, 2012

Milky Way Brownies

I have a special place in my heart from brownies. I love them. A lot. I prefer brownies to cake and cookies. The perfect dessert.... a warm brownie with vanilla frozen yogurt on the side drizzled with chocolate sauce and a dollop of cool whip right on top. Now, my husband is well aware of the obsession I have with brownies. He is so good to me. He loves apple pie, crips, cake.... but a good portion of the time we are eating dessert it is some variation of a yummy brownie. I try to branch out for him and I do (made him his OWN apple pie this past weekend) but once and a while I NEED a brownie. I justify my addiction by making them low fat. They are so very g-o-o-d too.

When my mom was alive, EVERY weekend we would have dessert and watch a movie. Living a couple blocks from each other was such a blessing! Again, my dad and rex are very sweet to put up with us. I would make the brownies, they would bring the frozen yogurt (nonfat of course) and the dessert feast would begin. So many good memories. Around here we save dessert for the weekend. Probably because we go all out and i have to set some boundaries for myself :) So it is a special occasion. I made these and oh baby they were good! A fudge brownie on the bottom, smothered in caramel and peanuts, topped with a chocolate ganache. Yeah, I will be making these again. Sorry honey :)


Ingredients:

1/2 cup applesauce
1 cup sugar
1 teaspoon vanilla
3 egg white or 1/2 cup egg beaters (i have been using egg beaters because it saves my eggs)
1/2 cup flour
1/3 cup cocoa
1/4 teaspoon baking powder
1/4 teaspoon salt
fat free caramel sauce
1/2 cup honey roasted peanuts (more if you like:)
1 1/2 cups chocolate chips
1/2-3/4 cup fat free half and half

1. Make up your brownies. Whisk together applesauce, sugar, vanilla, and egg whites. Add in your flour, cocoa, baking powder and salt. Mix until smooth and combined. Pour into a greased 9x9 baking dish. You could always line your pan with foil and spray that if you want to pop them out and cut them. It is a bit prettier, especially if you are serving them to company....But if you aren't trying to take a picture or serving them to a crowd you can just pour all the yummy goodness right into the sprayed pan.
2. Cook for 20-25 minutes or until center is cooked in a 350 oven. When they are done let them cool for a about 20 minutes. Now what I did was after they had cooled for a bit I poked the brownies all over with a skewer and then drizzled the caramel topping all over until the brownies are covered. Yum. Next sprinkle your peanuts over the caramel. Ok, lets make ganache.
3.Very easy. Put your chocolate chips in a sauce pan and turn the heat to med-low. As the chocolate starts to melt add in 1/2 cup of the half and half. When everything is combined and smooth you can add a bit more half and half to thin out the chocolate. You are going to carefully drizzle the chocolate over the top of the brownies and WAIT for them to cool. Good luck it is really hard because they look soooo good! Cut and eat!

* With desserts that need time to cool or set I try to make in the afternoon or even in the morning. So after the kids are in bed.... those brownies are mine!

Tuesday, March 13, 2012

Big Soft Pretzels

I have been wanting to make homemade pretzels for a long time. I finally did it and I can't believe it took me sooo long. They were easy and so delicious! Seriously, we loved them and ate them for dinner one night with a big veggie platter and dips! It was a fun dinner and the pretzels were warm, chewy and had a nice salty bite to them. Amazing. Try them! This recipe is from Alton Brown and it got like a million 5star reviews...and now I know why!


Ingredietns:

1 1/2 cups warm (110 to 115 degrees F) water
1 tablespoon sugar
2 teaspoons kosher salt
1 package active dry yeast
4 1/2 cups all-purpose flour
2 ounces unsalted butter, melted
Vegetable oil, for pan
10 cups water
2/3 cup baking soda
1 large egg yolk beaten with 1 tablespoon water
kosher salt

Directions

1.Combine the water, sugar and kosher salt in the bowl of a stand mixer and sprinkle the yeast on top. Allow to sit for 5 minutes or until the mixture begins to foam. Add the flour and butter and, using the dough hook attachment, mix on low speed until well combined. Change to medium speed and knead until the dough is smooth and pulls away from the side of the bowl, approximately 4 to 5 minutes. Remove the dough from the bowl, clean the bowl and then oil it well with vegetable oil. Return the dough to the bowl, cover with plastic wrap and sit in a warm place for approximately 50 to 55 minutes or until the dough has doubled in size.

Preheat the oven to 450 degrees F. Line 2 cookie sheet pans with parchment paper and lightly brush with the vegetable oil. Set aside.

Bring the 10 cups of water and the baking soda to a rolling boil in an 8-quart saucepan or roasting pan.

In the meantime, turn the dough out onto a slightly oiled work surface and divide into 8 equal pieces. Roll out each piece of dough into a 24-inch rope. Make a U-shape with the rope, holding the ends of the rope, cross them over each other and press onto the bottom of the U in order to form the shape of a pretzel. Place onto the parchment-lined half sheet pan.

Place the pretzels into the boiling water, 1 by 1, for 30 seconds. Remove them from the water using a large flat spatula. Return to the half sheet pan, brush the top of each pretzel with the beaten egg yolk and water mixture and sprinkle with the pretzel salt. Bake until dark golden brown in color, approximately 12 to 14 minutes. Transfer to a cooling rack for at least 5 minutes before serving.

You could also brush with a bit of butter and sprinke cinnamon and sugar on them and dip them in a glaze. Yum! We dipped in mustard and had them plain, they were amazing!

Wednesday, February 29, 2012

Cheese Burger Sloppy Joes

My husband loves sloppy joes. Loves them. So, I decided to create a new version of the classic for him. Well, as I thought.... he loved it! Well here you have it....tangy sauce, cheeseburger toppings, all on a toasted bun, oh delish!


Ingredients:

1 lb. ground turkey
1/4 cup chopped onion
1/2 cup ketchup
2-3 tablespoons spicy mustard
salt
pepper
chopped tomatoes
shredded lettuce
shredded cheese
sliced pickles
hamburger buns

1. This is so easy and great because it comes together really quick! First toss your onions in a non-stick skillet drizzled with just a teaspoon olive oil and cook over medium heat until they are a soft and translucent.
2. Next, add your ground turkey and crumble it into the onions. Cook all the way through. Add some salt and pepper. I like pepper, a lot.... so I added a little bit more. Time to add your condiments.
3.Add your ketchup and mustard and stir to combine. Add a splash of water to thin it out if it is a bit too thick. You want it to be nice and saucy. Now taste. Is it good? Add more mustard, ketchup, salt or pepper so it is just how you like it. Or don't touch it.... it is going to be delicious will all the toppings.
4. Toast your buns and top with your sloppy cheeseburger mixture. Right on topp add cheese, lettuce, tomato, and pickles and dig in!

*this is great with homemade french fries and fruit salad. Or in the summer, a nice juicy watermelon!

Monday, February 20, 2012

Glazed Baked Donuts

My husband started a mountain biking club at the high school where he works. So...what we have here is a bunch of high school boys riding around in the mud every other Saturday morning working up an appetite. I thought this is the perfect opportunity for me to try new recipes out on these boys. I mean they are high school boys. They will eat anything :) I made these a couple of weeks ago and they were a hit! I am pretty sure the plate came back with lick marks on it. They loved them and so will you!


Ingredients:

2 cups flour
3/4 cup sugar
2 teaspoons baking powder
1/4 teaspoon nutmeg
1 teaspoon salt
3/4 cup fat free milk
2 beaten eggs or 1/2 cup egg beaters
1 teaspoon vanilla
2 teaspoons melted butter (I used tub butter)

Glaze: 1 cup powdered sugar
1-2 tablespoons milk
(you want this glaze to be thin!)

Frosting: 1 cup powdered sugar
1-2 teaspoons milk
(you want this frosting to be thick, spreadable, but thick so adjust according)

* DONUT PANS: ok, so you can use different pans for this recipe. I have a donut pan. I LOVE it. It is so much fun to use! I have seen them at walmart, target, target on-line, cooking stores, amazon..... If you want to make these without the pan you can use a mini muffin tin and they will be more like donut wholes. You could also use a mini bunt pan. Look for the dount pans.... the 12 bucks is totally worth it!

Directions:

1. In a large bowl mix flour, sugar, baking powder, nutmeg, and salt. Stir in milk, eggs, vanilla, and butter. Beat together until well blended.
2. Spray you pans with non stick spray. Pour all your batter into a storage sized zip lock bag. Snip the end and pipe the batter into the pans about half full. They get puffy. Just start in one spot and pipe around in a circle until you meet up with your batter.
3. Bake at 400 for 8-9 minutes until they spring back when touched. Give them a few minutes to cool before you put them on a cooling rack.
4. Now I did a double glaze for extra yumminess, but you could just frost them or you can dip them in the thin glaze. Totally up to you.
5. For the double glaze you dip both sides of the donuts into the thin glaze. Then but them back on the cooling racks for excess glaze to drip off. Once the glaze is cooled and hardened you can go ahead and frost them. Add sprinkles, nuts, chocolate chips, coconut....whatever you want!

Thursday, February 9, 2012

Ham and Cheese Broccoli Roll-ups

This recipe is a spin off of a side dish that my mom used to make for us when I was a kid. I added the roll dough and a yummy sweet and spicy sauce and turned it into a main dish meal! It was soooo good. My husband and kids gobbled them right up. These will for sure be another dinner we will eat around here!


Ingredients:

1 batch of your favorite roll dough or refrigerated crescent roll dough (or Rhodes rolls thawed)
2-3 cups of trimmed blanched broccoli (how to blanch veggies at bottom)
sliced deli ham
sliced cheddar or Colby cheese
honey mustard sauce

Honey Mustard Sauce
1/3 cup light mayo
1-2 tablespoon spicy mustard
1-2 tablespoon honey
salt and pepper
I make the sauce with 1 tablespoon each mustard and honey and then taste it to see what I want to add more of. So just taste and adjust to your liking.

1. Divide your roll dough into 2 balls. I use my favorite roll dough that I make in the bread maker, but use any dough you want. Roll one of the balls out into a circle and you want the dough to be about 1/4 inch thick. Using your pizza cutter cut your dough into triangles. You should get 12 triangle wedges. Get all your toppings ready like this:


2. You are going to work with one triangle at a time. Spread a layer of sauce over your triangle of dough. Then at the wide end of the dough put a piece of cheese, top that with a folded piece of ham, and then top that with 2 pieces of broccoli. Like this:


3.Starting at the wide end again, roll up your filled dough and place on a sprayed and foil lined cookie sheet seam side down. Continue with the rest of your triangles. Now... that one ball of dough will make 12 broccoli ham roll ups, SO you can roll out your other dough ball and make another dozen or you can make a small batch of rolls (like I did). :) Totally your call. This is how all your roll-ups should look, yum!


4. Let those hang out for about 15 minutes and then pop them in a 375 oven for 18-20 minutes or until golden brown. I cooked mine for about 10 minutes and they started getting brown so I covered them with foil and cooked them for another 10 minutes until they were cooked through. Eat with fruit salad or melon and you are good! You can use your extra sauce to dip in if you want, but they are pretty darn good right out of the oven! YUM!

HOW TO BLANCH BROCCOLI: Super easy and really good for meals like this or for even dipping veggies in dip or hummus. Blanching takes away the super crunch raw flavor of veggies, but still keeps them crispy and tender. All you do is bring a pot of water to a full boil. Drop your clean and trimmed broccoli in and boil 1 minute. Take off the heat and drop into a colander and run COLD water over the top of the broccoli to stop the cooking process. You can also drop your veggies into a bowl of water filled with ice for an ice bath..... but I do the cold water running over because it is easy and works. Anyway, that's it

Tuesday, January 24, 2012

Chicken Caesar Sandwhiches

I love sandwiches and burgers. They are so comforting and yummy. They always taste delicious with homemade french fries and fruit salad. This sandwich was right up there with all the deliciousness that it was. It has all the flavor of a yummy chicken Caesar salad....on a bun. So good and really really quick!


Ingredients: (yield 4 adults)

4 chicken breasts
1/4 cup freshly grated Parmesan cheese
salt
pepper
fat free Caesar dressing
romaine lettuce
4 toasted buns
extras for toppings: sliced tomato
sliced olives

1. First lets cook the chicken. Salt and pepper each side of the chicken breasts. Cook them over medium/high heat in a bit if olive oil in non-stick skillet until cooked through.
2. While the chicken is cooking, it is time to make the sauce. In a medium sized saucepan pour about 1/2 of your dressing (I know, super technical measuring here) and add the grated cheese. Stir that all together and keep on low heat to keep warm until your chicken is cooked. Once your chicken is cooked through, remove and shred. Add all your shredded chicken to your sauce. Stir in all together...yum.
3.Now at this point you can add more dressing if you like your chicken extra saucy. If you want to thin is our a bit add a touch of water. It's all up to you and your preference. You just want it all warm and mixed.
4. Ok, no toast your buns and add whatever toppings you like. I like mine with lettuce, sliced tomato, and sliced olives.
* add some fruit and homemade fries and you are set!

Thursday, January 19, 2012

Mock Eclair Dessert

I got this recipe from Taste the Joy and I have been wanting to make it for forever!! Why I didn't make it earlier I am not sure but I finally did and it was amazing! Light and delicious with tons of sweet creamy flavor. This would be perfect for company, for your family, or maybe for you and your husband to eat all by yourselves....I am just saying it was really good and you all should make it this weekend!


Ingredients:

1 box low fat graham crackers
2 small boxes of french vanilla instant pudding (i used plain vanilla, that's all I could find and it was perfect!)
3 cups cold fat free milk
1 tub fat free cool whip

Frosting:

4 tablespoons cocoa
2 cups powdered sugar
4 tablespoons tub butter
1 teaspoon vanilla
4 tablespoons hot water

1. This comes together in no time. Place one single layer of graham crackers on the bottom of a 9x13. You can trim some of the crackers to make them all fit if you need too.
2. Mix your pudding and milk together. After that has set, fold in your cool whip. Pour half of the pudding mixture over the crackers. Top mixture with another layer of graham crackers. Pour the rest of the pudding on top of crackers. Ok, now put one more layer of crackers on top and set aside. Moving right along to making the frosting.
3. Cream your cocoa and butter together with a hand mixer. Add your vanilla and 1 cup powdered sugar. When it has come together add another cup and continue until all 4 cups have been added. Add water a little at a time until smooth and spreadable.
4. Spread on top of crackers and cover that baby and pop it into the fridge. YUM!!

Ok, now you MUST wait. The pudding soaks into those crackers and makes this dessert a dream, but you must wait. I suggest making it in the morning (like after breakfast early) so you can eat it after dinner. OR...... make it the night before and you will be set by the next day. Oh so good!

Thursday, January 12, 2012

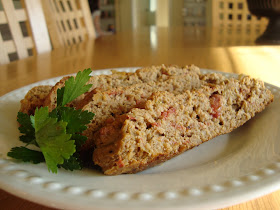
Tex-Mex Meatloaf

Meatloaf can be kinda well.....boring. But this recipe was so good! It was totally different from every other meatloaf recipe and with all the spices,tomatoes,and chilies mixed in, it was a Mexican hit! My kids even ate it....that is a good sign.


Ingredients:

1 lb. ground turkey
1/2 cup petite diced tomatoes
4 oz. can green chilies
1 egg
3/4 cup breadcrumbs
1/2 teaspoon salt
1/2 teaspoon garlic powder
1 teaspoon chili powder
1 teaspoon cumin
salsa
sour cream

1. Heat your oven to 400. This comes together really quick.
2. Put your ground turkey in a large bowl. Then....wait for it.... add EVERYTHING in right on top (except of the salsa and sour cream). Don't mix until everything has been added. This way your meat mixture won't be tough or over mixed. Combine all your ingredients (I used a spoon or you could use your hands) until combined.
3. Line a 13x9 pan with foil and spray with non-stick spray. Plop (very technical word) your meatloaf mixture into your pan and shape into a loaf or a log shape. I find that cooking my meatloaf this way it cooks much faster. But you could put it into a loaf pan and increase the cooking time until it is done if you want to.
4. Cook your yummy loaf for 55 minutes and let it rest for 5 minutes after it comes out of the oven. I covered mine in foil for maybe the last 15 minutes so just check the top and make sure it doesn't get to dark. Slice and serve! You can serve it with sour cream and salsa on the table if you want, but it is pretty darn good just how it is!

* Good sides would be roasted potatoes or vegetables and a green salad or steamed veggies and fruit, muffins or rolls.

Thursday, January 5, 2012

Greek Taboule Chicken Salad

Well, it is a new year and everyone is out to eat healthy and start fresh. I personally believe that you can eat healthy and light with main dish meals and dessert. :) That is what this blog is all about. I love food. Love it. I love cooking and enjoying time around the table with family and friends. There is so much good food out there just waiting for me to modify it, lower the calories and fat and make it just as good! So wish me luck!

Well this dish was outstanding! Seriously, really good. I had it at a friends house and then with in a week I made it too! We loved it and it was a fun way to introduce Greek food to my family. Super healthy, tons of flavor....try it!


Ingredients:
1 package of Taboule Wheat Salad (I got the NEAR EAST brand)
1 tablespoon olive oil
1 large tomato, chopped
2 tablespoons lemon juice
zest of one lemon
1 cup crumbled feta cheese
3/4 cup peeled, chopped cucumber
1/4 chopped fresh basil
chopped grilled chicken (for as many people as you are feeding)
salt and pepper to taste
romaine lettuce leaves

1. In a large bowl combine the taboule wheat salad and the spice packed. Stir in 1 cup of boiling water. Cover and let stand 30 minutes in the fridge.
2. While the taboule is cooling, chop your tomatoes, cucumber, zest and juice your lemon, chop your basil and grill the chicken. Ok, that seems like a lot, but you can totally get that all done in 30 minutes. And if not that's ok :)
3. After 30 minutes is up add in your tomato, cucumber, cheese, lemon zest and juice, olive oil and basil. Taste and add salt and pepper if you like. Toss that baby together and let it rest for 30 minutes to an hour before you eat.
4. When it is time to serve make a bed of torn lettuce leaves on your plate, top with your wheat salad and place you grilled chopped chicken right on top. Oh..... so good. Serve with lemon wedges and a fruit for a yummy dinner.

* You could also serve this with hummus and homemade pita chips like us.... yum!