Thursday, December 29, 2011

Peppermint Cheesecake Brownie Bites

Sorry it has been so long!! I can't believe I missed so much! Instead of blogging at night was sewing and trying to get Christmas presents done! But I am back and ready to cook....and eat!

Ok, here is a really yummy bite-size dessert that would be great for a New Year's treat! This makes a bunch and one just isn't enough! I love peppermint and chocolate together and add a bit of cheesecake and you can't go wrong!


Ingredients:

low fat Betty Crocker brownie mix (I can always find these at Safeway)
4 oz. low fat cream cheese, room temperature
1/4 cup egg beaters/ 2 egg whites/ 1 egg
3 tablespoons sugar
1/4 teaspoon vanilla
1 cup Andes peppermint chips

1. Using a hand mixer, mix the cream cheese until smooth and creamy. Add in the egg, sugar, and vanilla until mixed and creamy. Fold in the peppermint chips. Set aside.
2. Ok, now make your brownies. The low fat boxed mix is GREAT for making brownies in a short amount of time. You could also use your favorite box mix or make them from scratch. Either way these are going to be good! So mix up your brownies and spray your mini muffin tins. I chose to do bite-size brownies but you could do a full size pan and swirl in the cream cheese mixture and then cut them into bite size pieces too.
4.Moving on. For the mini muffin size you are going to put a heaping teaspoon of brownie batter into your greased tins. Then put a dollop of cream cheese mixture right on top. Probably about another teaspoon. Repeat until your tins are full and pop them into a 350 oven for 12-15 minutes. It could be longer depending on the type of pan you are using but you will know they are done when your cream cheese is cooked through.
5. When they are done, let them cool for a minute and run a knife around the edges to loosen and then pop them out.
6. Repeat the same process until your batter and cream cheese is all used up. Then enjoy!

Wednesday, November 30, 2011

Homemade Tortillas

There is nothing.... I repeat nothing better than a warm homemade tortilla. Seriously, I could just eat a stack of these babies for dinner but I am nice and shared with the rest of my family. These are incredible. They will change the way you look at tortillas forever. Try them, you will love them. Promise!


Ingredients:

2 cups of all-purpose flour
1 1/2 teaspoons of baking powder
1 teaspoon of salt
2 teaspoons of vegetable oil
3/4 cups of warm fat free milk

Directions:

1. Mix together the flour, baking powder, salt and oil in a large bowl. (I used my stand mixer)
2. Slowly add the warm milk. Stir until a loose, sticky ball is formed. Knead your dough for two minutes on a floured surface or in your mixer. The dough should be firm and soft.
3. Place your dough in a greased bowl and cover with a damp cloth or plastic wrap for 20 minutes.
4. After the dough has rested, break off 8-12 sections, roll them into balls in your hands, place on a plate (make sure they aren’t touching) and then cover balls with damp cloth or plastic wrap for 10 minutes. (It’s very important to let the dough rest, otherwise it will be like elastic and won’t roll out to a proper thickness and shape.)
5. After the dough has rested, one at a time place a dough ball on a floured surface, pat it out into a four-inch circle, and then roll with a rolling pin from the center until it’s thin and about eight inches in diameter. Don’t over work the dough, or it’ll be stiff. Keep rolled-out tortillas covered until ready to cook.
6. In a dry iron skillet or I used my electric skilled (usually used for pancakes)heated on high, cook the tortilla about thirty seconds on each side. It should start to puff a bit when it’s done.
7. Keep your cooked tortillas covered wrapped in a napkin until ready to eat. Eat them when they are warm..... so good!

* Have these with fajitas, soup, on the side with taco salad, or sprinkle with cinnamon sugar for a sweet treat!

Thursday, November 17, 2011

Taco Soup

Here is another wonderful, healthy, warm soup for you this fall. I started making this when I was first married and it has been a keeper! This recipe is made with ground turkey but you could use shredded chicken or an extra can of beans to make it a vegetarian meal. Anyway you go it is spicy and wonderful!!


Ingredients:

1 lb. ground turkey (or cooked shredded chicken)
1/2 onion, chopped
1 can sweet corn, undrained
1 can kidney beans, undrained
2 (15oz.) cans diced tomatoes, undrained
1 can diced green chilies
1 package taco seasoning
grated cheese
sour cream
chopped cilantro
chopped tomatoes
warm tortillas (homemade recipe is next!)

1. This is the easiest soup....ever. In a big soup pot heat to medium/high heat and cook your onions until they start to become translucent. Add in your ground turkey and brown until cooked through. Add your seasoning packet and to the meat and onions. Give that a stir and open ALL those cans.
2. One by one add your canned veggies and beans. Now if you want to go vegetarian add another can of kidney beans or a can of black beans. Also, if you are using chicken add that now. Allow your soup to come to a simmer to combine all the flavors. Turn it to low and keep warm until dinner.
3. If your soup gets a bit thick, just thin it out with a bit of water. When it is time to dish up you can add cheese, sour cream, diced tomatoes, chopped cilantro, crushed chips.....OK you can add a ton of stuff to really spice this soup up!

* Serve with tortillas on the side or corn chips. I made homemade tortillas that were amazing!! I seriously could have eaten those and been completely satisfied.... but the soup is good too!!
* Tortillas are the next post!

Saturday, November 12, 2011

Mini Pumpkin Cheesecakes

Oh my, these were soooo good! I have said before that I love cheesecake. I love mini cheesecakes because they cook fast and they are the perfect size. Well these cheesecakes were perfect! The sweet creamy pumpkin was the perfect fall treat. This recipe is from Our Best Bites and everything they make is fabulous! I altered it a bit to cut back on fat and calories but wonderful just the same!


Ingredients:

24 low-fat nilla wafers
1 cup white chocolate chips
3 packages low fat cream cheese
1 cup sugar
3/4 cup egg beaters
3/4 cup pumpkin
2 teaspoons vanilla
1/4 teaspoon nutmeg
1 1/2 teaspoons cinnamon
1/8 teaspoon cloves
whipped cream

1. Preheat oven to 350. Line 2 muffin tins with cupcake liners and place a nilla wafer in the bottom of each cup.
2. Melt your white chocolate chips in a bowl in the microwave for 30 seconds at a time until smooth. Set aside.
3. With an electric mixer, beat your cream cheese and sugar until smooth. Add in your egg beaters. Then mix in the pumpkin, vanilla, nutmeg, cinnamon and cloves. With the mixer running, slowly and steadily add in the melted whit chocolate in a stream.
4. Using a ladle or measuring cup fill your muffin tins 3/4 way full and place in oven. Bake for 20-25 minutes until center is just set.
5. Cool your cheesecakes for an hour at room temperature and then keep in the fridge until you are ready to eat.
6. When you are ready to serve top with a bit of whipped topping and dig in!!

* You could replace the nilla wafer for a ginger snap cookie if you want, yum!!

Tuesday, November 8, 2011

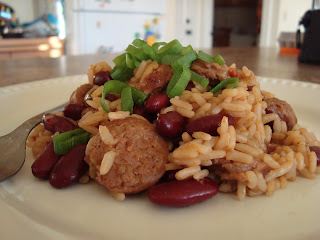
Red Beans and Rice with Turkey Sausage

This is comfort food. Yum. This meal is sooo quick to put together. Seriously, incredibly fast. In the time it takes to make this meal you can bake up some muffins and toss a salad or steam veggies and walla......dinner is ready! This is a great fall meal to warm cold bellies.


Ingredients:

1 box (8oz) dirty rice mix
2 1/2 cups water
2-3 turkey sausage links (the spicy kind are great!)
1 can kidney beans, drained and rinsed
1 large green onion, sliced

1. Get those sausages cooking. In a non-stick skillet, cook your sausages until cooked through. They can be cooking while you get your rice ready, which is next.
2. Ok, super easy here. In a 2 quart sauce pan heat rice and sauce mix and water until boiling. Reduce the heat to medium low. Cover and cook about 25 minutes. Stir every once and a while so rice isn't sticking to the bottom of your pan. Whenever your sausages are done cooking you can slice them up and add them in to the simmering rice to all the flavors blend.
3. When rice is tender go ahead and add your beans. Stir them in and cook about 1 minute until warmed through. Take your pan off the heat and let stand about 5 minutes. Fluff the rice and give everyone a nice big spoonful. Garnish with green onion.

* Corn bread or muffins would be great. A green salad or steamed green beans, broccoli, or roasted asparagus are all good veggies to have with this meal.

Thursday, November 3, 2011

Cheesy Stuffed Chicken

This meal was so delicious! My husband kept making mmmmmmm sounds. I'll take that as a good sign :)

I love chicken. It is so versatile and low in fat and calories. But, sometimes it can be bland if it's not spiced up just right. This meal is a great way to get out of your boring chicken routine. It looks so fancy but was really easy to make and would be perfect for entertaining. Seriously make this, you will love it!


Ingredients:

6 chicken tenders, pounded flat and thin
3/4 cup fat free ricotta cheese
1/4 cup sun dried tomatoes, finely chopped
1 garlic clove, minced
1/4 cup chopped fresh basil
salt
pepper
Italian seasoning

1. Heat your oven to 425 degrees. In a small bowl stir together the ricotta, basil, sun-dried tomatoes, and garlic until creamy and combined. Add a couple shakes of salt and grind some pepper in there too. Mix and set aside.
2. Line a cookie sheet with foil and spray with non-stick spray. On a cutting board, place your chicken that has been pounded flat. Using a spoon scoop out some ricotta filling and place in the middle of your chicken. (Remember you are stuffing 6 chicken tenders, so you can divide your mixture into 6 portions so they are the same)
Ok, now fold one half of the chicken over the mixture and then roll the chicken to seal the mixture in. Now, at this point you can use a toothpick to keep it closed, but I just picked mine up and placed it on the cookie sheet seam side down and it worked perfect. Do the same to the rest of your chicken and put on the cookie sheet.
3. Sprinkle each chicken with a bit of salt and Italian seasoning. Drizzle a little olive oil over the top and pop it into the oven.
4. Bake for 20-25 minutes until the tops are golden.

* Serve this meal with steamed carrots, broccoli, or green beans. A nice green salad would be nice, and some rolls or garlic bread.

Saturday, October 29, 2011

Halloween Goodies

Ok, you have just a few days to make a couple more Halloween treats soooo.... here are a few to snack on! I hope you enjoy!

Witch Broom cookies

Ingredients:
Peanut butter Cookies: (you could use your favorite recipe in place of this one if you wanted)
1/2 cup butter, soft (for low fat use a 1/4 cup applesauce)
1/2 cup peanut butter
1/2 cup sugar
1/2 cup brown sugar
1/2 teaspoon baking soda
1/2 teaspoon baking powder
1 egg
1/2 teaspoon vanilla
1 1/4 cup flour

honey wheat pretzels
chocolate melties
sprinkles

1. Mix up your cookie ingredients by creaming your butter (or applesauce) with sugars, peanut butter, and egg. Stir in the vanilla. Go ahead and add your dry ingredients and mix until well combined.
2. Next you are going place 6-8 pretzels on ungreased cookie sheet. Using a small cookie scoop make a ball of dough. Press each ball onto the end of each pretzel. Press the dough with a fork to resemble "bristles" of broom. Bake at 350 for about 8-9 minutes. Let the cookies cool for a few minutes on cookie sheet before carefully removing them onto a wire rack.
3. Heat up your chocolate in the microwave until smooth. Using a spoon, drizzle chocolate over the cookies and pretzel. You can also put white chocolate chips, peanut chips, or butterscotch chips in a zip lock bag and melt them, snip the tip of the bag, and drizzle over for a little more decoration. Sprinkle with sprinkles and enjoy!

Halloween Lunch


Sandwich of any kind : pb & J, turkey and cheese, tuna, whatever you and kids like
Halloween cookie cutters
carrots
pears
mozzarella cheese
gummy worms

1. Make your sandwich and using a pumpkin cookie cutter cut out your sandwich.
2. Next cut your veggies, fruit, and cheese and place them on a plate to look like candy corn.
3. For a sweet treat add some gummy worms and you have a fun lunch!

Pumpkin Gingerbread
I was going through my mom's recipes and I came across this one. I totally forgot about it and it is so good with tons of flavor! Perfect if you have some leftover pumpkin that needs to be used up! Moist,dense, and delicious with butter!


Ingredients:

2 cups flour (you can do one white and one whole wheat pastry flour)
2 teaspoons baking powder
1 teaspoon cinnamon
1/2 teaspoon baking soda
3/4 teaspoon ginger
1 cup pumpkin
1/2 cup brown sugar
1/2 cup molasses
2 egg whites
1/2 cup fat free vanilla yogurt
1/4 cup fat free milk
2 tablespoon vegetable oil
dash of salt

1. Preheat our oven to 350. Spray your loaf pan. Combine all the dry ingredients in one bowl. Mix all the wet ingredients in another bowl. Pour wet into dry and mix until just combined.
2. Pour into pan and bake for 35-45 minutes. I start checking my bread at about 30 minutes. When you are baking low fat breads it is really important to NOT over bake. It will lead to a dry bread. So start checking your bread early and take out as soon as your toothpick comes out clean.
3. Let cool before you wrap in plastic wrap for freshness. Yum!! This is really yummy, especially warm out of the oven!

Wednesday, October 19, 2011

Orange-Cinnamon French Toast

If you are anything like us you love breakfast for dinner. We do, we do it all the time. Like once a week. Yum. This french toast is amazing! You won't believe it is baked in the oven to golden perfection. It comes together in a minute and get this.... only 158 calories per slice! Seconds....yes please!


Ingredients:
2 tablespoons butter, melted
2 tablespoons honey
1/2 teaspoon ground cinnamon
3 eggs or 3/4 cup egg beaters
1/2 cup orange juice
1/8 teaspoon salt
6 slices of Texas toast

1. In a bowl combine butter, honey, and cinnamon. Pour into a greased 13x9 pan. Tilt the pan back and forth to coat the bottom of the pan.
2. In a shallow bowl, beat the eggs, orange juice, and salt. Dip your yummy fat bread into the egg mixture and place in the prepared pan.
3. Bake at 400 degrees for 15-20 minutes or until golden brown. Invert each piece onto plates or a serving platter. Serve with honey, butter, or syrup.

* Add fruit salad, fruit smoothies, hash browns, scrambled eggs, any or all to make this meal delicious!

Tuesday, October 11, 2011

Pumpkin Pudding Pie

I am loving the beginning of fall, bring on the comfort food. Well, bring on the comfort food that wont totally ruin your figure. Not to worry, I have so many yummy recipes to share :) But lets talk pumpkin, shall we? I LOVE pumpkin. I do. It is soo good! I have a stash in my pantry. Lovely cans of pumpkin. So here is a super easy, super yummy dessert that you will love. It is light with tons of flavor. This is sure to be a favorite!


Ingredients:

1 graham cracker crust (I used a store bought one but you can certainly make your own)
2 cups cold fat free milk
1/4 teaspoon cinnamon
2 packages (the size box that serves 4) jello pumpkin Spice flavor pudding
1 tub (8oz) fat free/light cool whip

1. Beat milk, dry pudding mixes, and cinnamon with a wire whisk until well blended. Spread 1 1/2 cups onto the bottom of crust.
2. Add 1 1/2 cups of the whipped topping to remaining pudding mixture. Stir gently. Spoon over the layer in the crust. Top with the remaining cool whip.
3. Yep, that's it. Now put your pie in the fridge until you are going to eat it. It looks fancy, but it is really easy. Top with candy corn and dig in!

adapted from COOL WHIP

Wednesday, September 28, 2011

Smores Bark

You are probably wondering where I have been..... well we moved. Yep, like packed up the house in 3 days and moved to a new town. Then unpacked the boxes in 2 days before Rex went back to work. It was CRAZY!! But I LOVE our house and we are settled in an doing great! I LOVE my new kitchen. It is big. Lots of counter space. Lots of cupboard space. Ok, it just has lost of space. So.... now I can return back to the blogging world now that our computer desk is up and we have Internet connection again.

My huband is a snacker. He loves to munch. Espically when we are all set to watch a movie. So, I totally made these up for both of us. He has a yummy snack and I love them because I am obsessed with anything smores related. It is really good and kinda addiciting..... oh, and it is easy!


Ingredients:

golden grahams cereal
mini marshmallows
m&m's
white melting chocolate (almond bark or the white disks)
sprinkles
mini chocolate chips

1. Now this is really simple. Grab a cookie sheet and line that baby with wax paper. Next pour your golden grahams over onto the sheet. This is one of those recipes where you kinda make as much as you want. But I would say 2-3 cups of cereal. Next, sprinkle marshmallows over the top and kind of mix them together. Again, as many as you like. You want an even layer on your cookie sheet. If you have everything over lapped too much, when you pour the chocolate over it won't stick to everything resulting in a ton of goodies on the bottom of your cookie sheet not stuck to anything.
2. Ok, Melt your white chocolate (about 1-1/2 cups melted). When it is smooth, drizzle over the top of your cereal/marshmallow mixture. Get it all over everything!! Next sprinkle m&m's, baby chocolate chips and colorful sprinkles over the white chocolate.
3. If you want to really go crazy, melt a handful of chocolate chips in a zip lock bag and snip the tip off. Squeezing the chocolate, drizzle a thin chocolate layer over everything. Now, be patient. Let it harden and cool. (pop it in the fridge to speed things up) Then dig in!!Break it into chunks and snack. Keep left overs in an airtight container of bag.

Saturday, September 10, 2011

Chicken and Avocado Stuffed Quesadillas

Quesadillas are aways a favorite around here, but these ones are extra yummy! They are stuffed with grilled chicken, avocado, and cheese. Really, you can't go wrong. The creamy avocado gives it great flavor and the outside is crispy and warm! Dip in sour cream and salsa and you are in heaven!


Ingredients: (You can make as many or little as you like)

jalapeno cheddar tortilla wraps (the big ones)
grilled chicken, shredded
sliced avocado
grated cheese, pepper jack, colby,mozzarella, or cheddar
sour cream
salsa

1. Really easy here. Heat a non-stick skillet to medium-high heat.
2. I make my quesadillas in halves. By using one tortilla and filling just one side of it and folding the other side over on top. It makes it a ton easier when you are flipping a quesadilla stuffed with goodness. SO.... On one half of your tortilla sprinkle your cheese then place you chicken and avocado slices on top. Next, sprinkle a bit more cheese so everything stays together. Then fold the other half over. Kinda press on the folded tortilla to keep everything in place. Butter the side that is face up and carefully put your stuffed tortilla butter side down in your skillet.
3. While it is cooking butter the other side and after a few minutes CAREFULLY flip your quesadilla to cook the other side.
4. When the cheese is melted and the tortilla is golden brown and crispy slid that baby onto a cutting board and cut into 4 pieces. Now make as many as you want and dip in sour cream and salsa!

* You can add sauteed onions and tomatoes for a bit more flavor too.
* You can omit the chicken and load it with veggies or a great vegetarian meal.
* Add some watermelon and corn on the cob and you have a great summer meal!

Sunday, September 4, 2011

Homemade oven french fries

Sorry it's been so long! Ahh, we have been busy. Busy with friends, family, new job, house hunting, and everything in between! So today you get two new recipes! First is my yummy homemade french fries and second is a cool and refreshing oreo pudding poke cake!

I LOVE these fries. I have been making them for.... well since forever. Ask my husband how many time we have had frozen fries out of a bag since we have been married and he will be able to count on one hand. These are WAY better in flavor and better for you in general. Crispy and salty on the outside, soft and warm on the inside. Great with burgers.....yum.


Ingredients:

russet potatoes, washed and dried
olive oil
salt
season salt

The great thing about this recipe is it can be altered for lots of people or for a few people. Whatever you like. We love these babies so we use 5-6 potatoes for me, my husband, and my two hungry hippo little girls.

1. Cut your fries into strips. YOU can make them skinny or fat. Fat take a bit longer to cook so I do medium sized. I leave the skins on because I love the flavor and the skins have good nutrients in them. But is you prefer, you can peel them first. After they are cut toss all your potatoes into a big bowl.
2. Drizzle a bit of olive oil (just eyeball it) over the top. Toss with your hands to coat. Sprinkle with salt and toss again.
3. Line a cookie sheet with foil and SPRAY with non-stick spray. REALLY GOOD. If not, you will just be looking at your yummy fries because they will be stuck on there so good you won't be eating them. I know this from experience :) Dump all your fries on the pan and using your hands make an even layer on the pan. Now, sprinkle them with season salt.
4. Put them in a 425 oven for 20 minutes. After 20 minutes, pull them out and using a spatula, toss them over to brown the other side. Cook for 5-10 more minutes. Taste and see if you need any more salt. Then, plate them up and eat! Yum!!

Oreo pudding poke cake

Here is the Oreo Pudding Poke cake. This cake is in honor to my sweet hubby! After graduating last year with his masters in school counseling we have been on the job hunt for a year!! For the past 3 years he was working at a middle school as a attendance clerk, going to school, and is a fire fighter every summer, but really wasn't doing what he loved. Well, our prayers were answered and Rex was offered a counseling position at a nearby High School and we took it! YEAH!! So.... I wanted to celebrate! We went out to dinner with family and friends, me and the girls got him tons of "office stuff" and then I made this yummy cake! He loved it and announced that it is his new favorite. That is always a good sign. :) So here it is....


Ingredients:

white cake mix
applesauce, egg beaters/egg whites, water
fat free chocolate pudding
2 cups of cold milk
reduced fat oreos
1 tub fat free cool whip

1. Really easy here. This cake is super moist and delicious after being chilled in the fridge. First, let's make the cake. Turn your oven to 350. Follow the directions on the back by using the same amount of water as directed. Instead of oil, replace the exact amount with applesauce. And for the eggs, use either 4 egg whites, or 3/4 cup egg beaters. Now, before pouring your cake into your greased pan, take as many or as little oreo cookies as you like and break them into small pieces. Not too small. You want small pieces in your cake, chunks of cookie. Fold your broken cookies into the batter and then pour into your cake pan. Cook for directed amount of time in a 9x13. When the cake is done let it cool for about 10-15 minutes.
2. Using a wooden spoon (or any mixing spoon handle) poke holes in your cake. Space them about 3/4 inches apart. If the holes are too close the cake with fall apart. If they are too far apart, then you won't have as much yummy filling. Now when you are poking the cake after 2-3 pokes the cake will start to stick to the spoon. SO..... clean off the spoon every couple pokes. I know, annoying, but worth it. Ok, after you are done poking it is time to make the pudding.
3. In a mixing bowl, mix your chocolate pudding and 2 cups of cold milk with a whisk. Beat for about 2 minutes until combine. Next step: IMPORTANT. As SOON as you are done mixing up the pudding pour you pudding into a glass measuring cup (or a cup/bowl with a pouring spout) and pour into each hole. If you just dump all the pudding on top it might not make it down into all the holes. So just pour into each hole until it is filled to the top. Move quickly, the pudding will start to get thick. After each hole is filled just spread the rest of the pudding on top, kinda like frosting. Ok, let that sit in the fridge for 5 or so minutes.
4. Now, put the whole tub of frosting on top and gently spread all over the cake. Sprinkle with more broken cookies and you are done! Let the cake chill for an hour or so to really get moist. YUM!! Keep covered in the fridge and enjoy!

Wednesday, August 24, 2011

Mini Chocolate Cheesecakes

These are the best cheesecakes....ever. Super easy and low in fat. Perfect. I won't tell you how many me and my hubby ate while watching a movie over the weekend :) Just looking at these pictures makes me want to bake them again! Too good to only have one!


9 reduced fat Oreo cookies
2 packages (8 ounces each) PLUS 3 more ounces low fat cream cheese, softened (trust me..... you won't be able to tell. Seriously)
1 cup granulated sugar
1/4 cup unsweetened baking cocoa
2 teaspoons vanilla
3/4 cup egg beaters
fat free cool whip
1/4 cup chocolate chips
fat free half and half

1. Heat oven to 350ºF. Line 18 muffin cups with paper baking cups. Split oreos in half. Place 1 cookie half, frosting side up, in each cup.
2. In large bowl, beat cream cheese with electric mixer on medium speed until smooth. Gradually beat in 1 cup sugar and the cocoa until fluffy. Beat in vanilla. Beat in egg beaters, a 1/4 cup at a time, until well blended. Divide evenly among cups (cups will be almost full).
3. Bake cheesecakes 20 to 25 minutes or until centers are firm. Cool 15 minutes (cheesecake centers will sink while cooling). Refrigerate in muffin cups at least 1 hour; cover and refrigerate at least 1 hour longer before serving.
4. When they are cooled and ready to eat make the chocolate sauce. I always make the same thing. Chocolate ganache. It is easy with 2 ingredients and yummy! Melt 1/4 chocolate chips in a small sauce pan over low heat on the stove. Next add a couple tablespoons at a time of the fat free half and half. It is TOTALLY up to you how thick or thin you want your sauce. So just add as much liquid until desired consistency. Then, drizzle over cheese cakes, top with cool whip, a bit of Oreo, and dig in. This dessert will change you life..... YUM!

Wednesday, August 17, 2011

Teriyaki Turkey Burgers

I love burgers. My husband loves burgers. And add some homemade fries, oh man....so good. Every year on my birthday growing up I got to pick what I wanted for dinner. Yep, you guessed it, burgers. So I am always trying out new combos for gourmet burgers and these teriyaki burgers are amazing! Especially when you cook them on the grill. They stay nice and juicy!


Ingredients:

1 lb. ground turkey
2 cloves garlic, minced
1/3 cup teriyaki baste/glaze
2 green onions, chopped
1/2 cup bread crumbs
1/4 teaspoon ground ginger
salt
pepper

Toppings:
crushed pineapple (slightly drained, you want a bit of juice)
cheese
lettuce
grilled/sauteed onion (cut into rings)
tomato
buns
teriyaki mayo: 1/4 cup teriyaki baste and 2 tablespoons mayo whisked together

1. Heat your grill or a non stick pan to medium/high heat. Combine ground turkey, garlic, baste, green onions, bread crumbs, salt, pepper and ginger. Use your hands, it is easier and really insures that all the ingredients are combined.
2. Shape into 4-6 patties. Kinda depending on how big and thick you want you burgers. As I shape my patties I put a bit of olive oil on each side and then place them on a small square of wax paper. Then I put another piece of wax paper on top. Now my next patty won't stick and it makes it really easy to just place them right on the grill.
2. Grill/cook your burgers for about 5 minutes a side. After you have flipped them for the first time, top with the onions and then the cheese. The cheese will melt and keep the onions on your patty. When the burgers are finished cooking, put them on toasted buns slathered in the teriyaki mayo. Then top with juicy crushed pineapple, lettuce, and tomato.
3. Serve with baked fries, watermelon, and root beer! SO GOOD!!

Friday, August 12, 2011

BLT Gourmet Wraps

Yum! I love wraps. So many good flavors all stuffed into a giant delicious sun dried tomato wrap. Really...you can't go wrong. This is a perfect summer meal that comes together in no time and the dressing drizzled over top is so good! This makes two adult servings, but you can easily adjust to any number of people! Try this, today!


Ingredients:
2 sun dried tomato wraps
6 slices of cooked turkey bacon
1 thin sliced tomato
1 bag of baby greens (spinach, leafy greens, any kind will work)
2 hard boiled eggs, sliced thin
8 pieces of mozzarella cheese, sliced thin

DRESSING:
1/2 cup fat free sour cream
2 tablespoons white distilled vinegar
2 tablespoons sugar
2 teaspoons Italian seasoning
1/2 teaspoon salt
1 garlic cloves, minced
1/2 teaspoon spicy mustard

1. Mix all the dressing ingredients together and set aside.
2. Super simple here. Lay your tortilla flat. Lay a bed of mixed greens on top of your tortilla to cover completely. Next place 3 pieces of turkey bacon on each wrap. Next a layer of tomato, 4 slices of cheese, and slices of egg. Drizzle 2 or tablespoons (or more, if you like) of dressing over all the ingredients. Next, fold the ends in and roll it up. Slice it into 2 pieces and dig in!

* This is great with a fruit salad, melon, or smoothies. Try different tortilla flavors too!!

*recipe adapted from Better Homes and Gardens

Monday, August 8, 2011

Caramel Apple Cheesecake

Oh how I love cheesecake....it's just so darn good! And you don't have to feel so guilty because I cut tons of fat and calories out of this baby! This was so yummy and easy to make. The apples and caramel were heaven with the creamy cheesecake. A great summer treat, especially nice and cool right out of the fridge!


1 honey maid Graham Pie Crust
1 can (21 oz.) apple pie filling
1 package (8 oz.) low fat cream cheese, softened
1/2 cup sugar
1 teaspoon lemon juice
1/2 teaspoon vanilla
3/4 cup egg beaters (this cuts out most of the fat and cholesterol and doesn't alter the flavor one bit. I always have it in my fridge just for baking) or 3 eggs
1/2 cup fat free caramel ice cream topping
chopped walnut

Directions

1. Place the crust on a baking sheet. Spread half of the apple pie filling in the crust. Set aside.

2. In large mixing bowl beat cream cheese, sugar, lemon juice and vanilla on medium speed of electric mixer until fluffy. Add egg beaters in a 1/4 cup at a time, mixing until just combined. Gently spread cream cheese filling over apples in the crust.

3. Bake on your baking sheet at 350°F for 30 to 35 minutes or until center is almost set. Cool for 1 hour. Be patient, it is worth it!

4. Refrigerate for at least another 3 hours. So, I would make this in the morning or after lunch when your kids are nicely playing in your living room... or like mine who are fighting over every toy :) This way your cheesecake will be cooled and ready to eat and it won't be 11 p.m. when you and your husband are eating dessert.

5. Now with the rest of those apples. I know there is a bunch of sauce left to so get a BIG cutting board and pour out the filling. You need to chop those apples a bit smaller so slicing your cheese cake will be easier. After they are bite-sized, spread the remaining pie filling over the top of the cooked cheesecake. Drizzle with ice cream topping. OR, what we did was cut ourselves a piece of cake and then drizzle with caramel. Whatever you want to do is great. Garnish with chopped walnuts just for kicks and delicious flavor too. Store in the refrigerator.

Friday, August 5, 2011

Soft Breadsticks

These are SOOOO good. Seriously, I make them at least once a week. I think I have a problem....I love anything bread related. Anyway, I got this recipe from Taste the Joy and it is a keeper! Really easy and anyone can make these. You don't have to wait hours either, they are done in no time!


Ingredients:

1 TBS yeast
1 TBS sugar
1 TBS malted milk powder (I have made them without this because I didn't have it on hand and they turned out just as good)
1 1/2 cups warm water
4 cups flour
1 tsp salt

1. Mix sugar and yeast together in a bowl or mixer. Pour warm water into yeast mixture. Soften yeast in water, about 5 minutes. Add remaining ingredients and knead for 5 minutes or till soft and elastic.
2.Shape into breadsticks and let rise on a foil lined and sprayed cookie sheet for 10-20 minutes, till desired size.
3.Preheat oven to 425 and bake about 10-13 minutes till golden. Then I spray my breadsticks with butter flavored cooking spray AS SOON as these babies come out of the oven. It keeps them soft. Then sprinkle with salt or garlic powder to finish! YUM!!
* These are great with any salad, pasta dish, soup, comfort meal, ok....they are good with anything!

Monday, August 1, 2011

Strawberry Chicken Salad with Candied Walnuts

Yep, another salad. I want everyone to love salads as much as me! This salad was amazing! I mean we gobbled it up! Perfect cool summer meal, paired up with some homemade bread sticks, rolls, or muffins, you are in for a treat!


(lightly adapted from Betty Crocker)
Dressing:
1/4 cup light mayo
1/2 cup Fat Free lemon yogurt
1/2 teaspoon sugar
1/4 teaspoon ground ginger
1/2 teaspoon lemon peel
Dash salt

Salad:
3 cups chopped cooked chicken (season with salt and pepper)
3/4 cup chopped celery
1/2 cup chopped candied walnuts
1 cup sliced or quartered strawberries
chopped Romain lettuce

1. This is really easy. Maybe too easy. Ok, combine all the dressing ingredients in a medium sized bowl. Toss in the chicken, celery, candied walnuts, and the strawberries. Toss to combine. Coat everything in this yummy sauce.
2.On your plates, make a nice bed of lettuce. Now top with the chicken mixture. That is it! Eat and enjoy.

* Great with any yummy bread. French buttered bread, muffins, bread sticks (next to be posted!!!) or rolls. Yum, can't wait to eat this again!

Tuesday, July 26, 2011

Spicy Sausage and Artichoke Pasta

My sister gave me an awesome cook book full of super low fat recipes and this is one of them! Yum, I love artichokes, and sweet sausage, and pasta..... So this dinner was perfect! It all comes together really quick too! Sure to fix a pasta craving any night!


Ingredients:

1/2 lb. sweet turkey sausage
8 oz. short pasta
3 medium tomatoes, diced
1 medium onion, diced
1 cup slices fresh mushrooms
3 cloves of garlic, minced
1 tablespoon dried basil
1 tablespoon dried oregano
1/8 teaspoon cayenne
1/4 teaspoon pepper
1 can artichoke hearts, drained and quartered
2 tablespoons lemon juice
fresh parmesan cheese

1. Start by boiling a big pot of water. When your water is boiling toss in some salt and the pasta. Cook pasta 9-11 minutes or until al dente.
2.While your pasta is cooking, lets get working on the sauce. Start by cooking your turkey sausage in a non-stick skillet over medium-high heat. When the meat is cooked through add in the tomatoes, onion, mushrooms, garlic, basil, oregano, cayenne, and black pepper. Stir everything together and cover. Cook 10-12 minutes, until tomatoes are soft.
3. Add the artichoke hearts and lemon juice to the skillet. Cook until everything is heated through. When the pasta is done cooking add the pasta into the skillet. Sprinkle with 1/4-1/2 parmesam cheese and toss is all together. Add a bit of pasta water to make a nice sauce..... yum!
4. Plate your pasta and enjoy.

* serve this dish with a crisp green salad, fresh fruit, and garlic bread!

Thursday, July 21, 2011

S'mores Brownies

I am totally obsessed with making "s'mores" desserts right now....it must be summer. Anyway, these brownies were SO good that I am pretty sure I ate most of them myself (sorry Rex). All the fixings of a s'more, layered into a brownie, YUM!


Ingredients:
1/2 cup applesauce
1 cup sugar
1 teaspoon vanilla extract
3 egg whites
1/2 cup flour or whole wheat pastry flour
1/3 cup cocoa
1/4 teaspoon baking powder
1/4 teaspoon salt
2 graham crackers, broken into small pieces
mini marshmallows
2 cups chocolate chips
1/2 cup fat free half and half


Yum.... what a wonderful combonation

1. First mix your brownies together by mixing your applesuace, sugar, and vanilla together. Next, add your egg whites. Beat them in and then add your cocoa, flour, baking powder, and salt. Mix until everything is combined. Pour into your greased 9x9 pan and bake at 350 for about 20-25 minutes, until a toothpick comes out clean.
2. Then comes the good part. Right after you pull the brownies out of the oven take about 1 cup of chocolate chips and sprinkle them evenly over the top. Let them get shiny then spread them with a knife to make a nice frosting. Next, sprinkle your graham craker pieces over the melted chocolate. You want them to cover the top. Ok, here is the marshmallow part. Sprinkle your graham crackers with mini marshmallows. Probably a couple handfulls will get the job done. (I didn't really keep track, just kept tossing them on there until they covered the top). Crank your oven up to broil and pop the pan back in for about 1 minute. KEEP YOUR EYE ON THEM. These brown up fast so watch them. They can quickly go from golden brown to burnt. Believe me I know :)

Pretty huh... wait, your not done yet!
3. Give your brownies about 15- 20 minutes to cool a bit. But while you are waiting make your frosting. In a small saucepan combine one cup of chocolate chips and 1/2 cup of fat free half and half and melt over medium low heat. Stir with a wisk until smooth. (If it seems to thick add a little more half and half.)
4. Carefully pour the melted chocolate over the marshmallows making an even layer. You can use a knife to spread it to the edges so there are no gaps. Let chocolate cool before cutting, about 30 minutes. For faster cooling put them in the fridge.
Cut a big square, pour a glass of milk, and enjoy!

Sunday, July 17, 2011

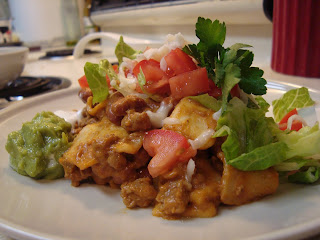
Enchilada Skillet

I love creating recipes and this just so happens to be one! We love Mexican food....warm, saucy and spicy. Oh yum, takes me back to me waitressing days at good old Gringos :) Anywhoo, this meal was a hit, I love the tortillas mixed right in and the fresh veggies on top!


Ingredients:

1 lb. ground turkey
1 packet taco seasoning
1 can pinto beans
1/2 can enchilada sauce (10 oz. size)
1 cup chicken stock or chicken broth
2 tablespoons fat free sour cream
2 low fat flour tortillas, cut into 2 inch squares
chopped lettuce
chopped tomato
grated cheese
fat free sour cream
guacamole

1. Start by cooking your ground turkey. After it is mostly cooked through season your meat with your taco seasonings. Add a bit of water to really incorporate the seasoning in. Ok, next toss in those beans, enchilada sauce, and sour cream. Stir to combine.
2.Next add a little bit of chicken stock at a time so your mixture remains creamy, not runny. You might not use the whole cup of liquid. Next, add in your tortillas. I love this part. I love warm, soft tortillas and covered in enchilada sauce... ah yes please! Stir those babies in nice and good, get them covered! Let that cook up for a couple minutes so the tortillas are soft. If you want, add a bit more stock if you want it thinner, I just happen to like thick creamy sauce.
3. Ok, time to plate! Give everyone a nice big scoop, top with lettuce, tomatoes, cheese and sour creams and guacamole! Oh, I can't wait to make this again!

* If you want add corn, olives, green chilies... Serve this meal with fresh watermelon, a green salad, or rice.
* Leave out the ground turkey for a great vegetarian meal!

Thursday, July 14, 2011

Teriyaki Ginger Marinade

This is a great marinade that goes perfect with any grilling that you want to do this summer! Try this with chicken, beef or pork. The trick with this marinade is to let your meat marinade over night, the flavors are amazing!


Ingredients:

1/2 cup soy sauce
1/2 cup water
1/2 cup brown sugar
1 tablespoon fresh minced ginger
1 tablespoon minced garlic
2 tablespoons chopped green onion

1. Combine all the ingredients in a bowl. Put your choice of meat in and allow 2-12hours to marinade.
2. Grill and enjoy!!

* Pair up your main dish with any of these: sweet potato fries, fresh green salad, watermelon, corn on the cob, fruit salad, muffins, french bread or rolls.
* Fresh ginger is so important in this marinade, but your probably wondering what to do with the left over piece of ginger huh? Well, put it in a zip lock bag, squeeze all the air out and place it in the freezer. It will stay fresh for a couple months in there. Plenty of time to make more teriyaki ginger marinade!!

Wednesday, July 6, 2011

Chocoalte Raspberry Layerd Cake

I love this blog. I love food. I love cooking and baking. Why do I feel like I don't have enough time in the day to post then??? Oh yeah.... this is why.... :)
(all decked out in 4th of July attire)

I love my girls. I feel so lucky that I get to stay home and cook and play with my girls. But time slips away and before you know it, it is 11:30 p.m. and I haven't even turned on the computer all day! I PROMISE that I will be posting at least 2 times a week now that we are on a better schedule and Olivia is more settled. AND, I have a ton of pictures ready to be posted.... so there you go! Whoo hoo!

Ok, on to one of the best cakes ever! Rex requests this cake every time I ask him what he wants for dessert. Usually I find so wonderful chocolate creation and make it before I even ask him if it sounds good.... He is so good to put up with me :) This cake is amazing. And easy too! I cut a TON of fat and calories out so cut a big slice and enjoy!


Ingredients:

1 devil's food cake mix
egg whites, applesauce, water
1 8 oz. package low fat cream cheese, softened
1/3 cup white chocolate chips, melted and cooled a bit
1 tub fat free cool whip, thawed
1 cup seedless raspberry jam
1 cup semi-sweet chocolate chips
1/2 cup fat-free half and half

1. Prepare the cake as directed substituting the applesauce for oil and egg whites for eggs. Pour into two 9 inch pans that have been sprayed with non stick spray. Bake as directed. Let the cakes cool in the pans. When they are cool, carefully remove them and wrap them tightly in plastic wrap and freeze for an hour.
2. Beat the cream cheese in a large bowl with electric mixer and until creamy. Add the melted white chocolate and mix well. Next with a whisk, gently stir in 3/4 of the tub of cool whip. If your mixture seems lumpy that is ok. I probably means that the cool whip was cold and the melted white chips cooled quickly in the mixture. Don't worry, it won't effect the filling or flavor at all. It will be perfect.
3. Ok, lets assemble this cake! Carefully cut your cakes horizontally in half with a long sharp knife. I used my bread knife. You will have 4 layers. Make sure to trim all the layers to be the same thickness. Place 1 layer on a plate or cake stand. Spread it with 1/3 cup of jam. Then carefully spread 1/3 of the cool whip mixture on top of the jam. Take your time and spread it evenly. Repeat the cake, jam, cool whip layers 2 more times and top your cake with the last layer of cake.
4. In a sauce pan on the stove, melt your chocolate chips and half and half together until smooth and creamy. You want it to be pourable, so add a bit more liquid if you need to. Ok, pour that yummy sauce all over the top and allow a bit to drip down the sides too. Oh yum......Let your cake set for an hour or two so the flavors really come together. ENJOY!

Sunday, June 26, 2011

Rice Bowls

WE LOVE these rice bowls for dinner! Super easy and really healthy too! This is a light meal with lots of flavor and everyone will enjoy!


Ingredients:

1 can black beans, rinsed and drained
1 can sweet corn, rinsed
tomatoes, chopped
instant brown or white rice (make the appropriate serving size for your family)
chopped avocado
chopped olives
grated cheese
this dressing


1. Ok, this is really easy.....seriously. First, cook your rice. I always cook mine in chicken stock or throw in a couple bouillon cubes for a bit more flavor. This takes about 10 minutes to cook. Prepare all your fixings while your rice cooks!
2. You have to make the creamy cilantro dressing....this is why these bowls are sooo good!! So make that too while the rice is cooking.


3. Ok, time to make the rice bowls!! Start with rice on the bottom. Next I put the cheese (so it melts a bit) and then beans, corn, tomatoes, avocados, olives. Pour that yummy dressing on top, and dig in!

* You could add in grilled chicken or taco seasoned ground turkey, that would be good!
* Serve these bowls with warm tortillas and watermelon! Yum!

Thursday, June 16, 2011

Waffles and Caramelized Brown Sugar Peaches

I came up with this one night when we were having waffles for dinner but wanted fruit as our topping. These peaches are so wonderful! Everything I thought they would be! :) And a waffle with peaches and whipped cream is all-right by me!


Ingredients:

Waffles: (or use your favorite or from a box is great too!)
1 cup flour
1 tablespoon sugar
1 teaspoon baking powder
1/4 teaspoon baking soda
1/4 teaspoon salt
1 beaten egg or 2 egg whites
1 cup fat free milk
2 tablespoons canola oil

3 cans peaches in light syrup, drain, but save the juice
1 teaspoon tub butter
4-5 tablespoons brown sugar
dash of cinnamon
dash of nutmeg

1. Stir all your dry waffle ingredients together. In a separate bowl combine the egg, milk, and oil. Pour your wet ingredients into the dry. Mix just until all combined. Don't over mix, we want nice fluffy waffles don't we?
2. Ok, cook the waffles and while they are cooking let's caramelize some peaches. It is really easy. Heat a saucepan on the stove to medium heat. Add your butter and wait until it has melted then add in all your peaches. Add the brown sugar and cinnamon and nutmeg and turn your heat me medium low. Add a splash of your reserved peach juice to make a nice sauce. Now just let the peaches simmer in the brown sugary goodness until all you waffles are cooked. If it seems like the peaches are cooking out all the liquid and start to stick to the bottom of the pan, add a bit more peace juice. You want a nice saucy consistency.
3. When you waffles are all cooked top with peaches and a dollop of whipped topping! yum!!

* Serve these waffles with homemade smoothies, hash browns, eggs, or bacon! Yum, we love breakfast for dinner.

Tuesday, June 7, 2011

Hot Fudge Pudding Cake

This cake is amazing!! It is low fat (if you use fat free milk it's non-fat!) and has it's very own fudge sauce to go with it! Can you really ask for more....I don't think so. I make this all the time and it is perfect pared with vanilla ice cream.


1-1/4 cups sugar, divided
1 cup flour
1/2 cup cocoa, divided
2 teaspoons baking powder
1/4 teaspoon salt
1/2 cup fat free milk
1/3 cup applesauce
1-1/2 teaspoon vanilla
1/2 cup packed brown sugar
1-1/4 cup HOT water

1. Heat oven to 350.
2. Stir together 3/4 cup sugar, flour, 1/4 cup cocoa, baking powder and salt. Stir in the milk, applesauce and vanilla. Beat until smooth. Pour into a greased 9x9 baking dish.
3. In another bowl, stir together the remaining 1/2 cup sugar, brown sugar, and remaining 1/4 cup cocoa. Sprinkle the mixture evenly over the batter in pan. Next, pour the hot water over top of the dry mixture. I know this sounds weird, but trust me, this is how the yummy sauce is made. DO NOT STIR, just pour it over the top and place it carefully into the oven.
4. Bake for 25-30 minutes or until the center is set. Let stand for 15 minutes then spoon into dishes, spooning the delicious fudge sauce off the bottom and top with whipped cream and ice cream. You will be in heaven!!

Tuesday, May 31, 2011

BBQ Chicken Salads

Is anyone else ready for summer? We are and with that comes salad season!! YUM!! I love salads for two reasons: 1. delicious, light, and tasty, 2: I feel that it is only appropriate to have a big chocolate dessert (post soon to come on chocolate desserts to die for) because I had a salad for dinner :) Around here we have salad night every Friday, switching it up with different salads, and what a good night it is....


Ingredients: (make a big salad for everyone eating dinner)

Romain lettuce, washed and chopped (enough to make a big pile on each plate)
bbq chicken, cooked and chopped (just coat your chicken breasts in your favorite bbq sauce and cook them up on the stove. Then chop them when cooled and toss in a bit more sauce)
tomatoes, chopped
carrots, sliced
1 can corn, drained
olives, chopped
bacon or turkey bacon, cooked and chopped
avocado, chopped

1. Plate each dinner plate with lettuce, tomatoes, carrots, corn, olives, bacon and avocados. Then top each salad with chicken. Super easy and way too delicious to be so healthy. Top with your favorite dressing. Ranch is good, bbq ranch is better!

* I make bbq ranch by putting 1/4 cup low fat ranch dressing (I love hidden valley) and a tablespoon or two of bbq sauce. Mix that up and drizzle it over your salad....heaven.
* I serve salad with muffins, bread sticks, or rolls for dinner. Yum, can't wait for Friday!

Sunday, May 22, 2011

CHEWY granola bars

YUM! This recipe is my mom's and it is amazing! These are the best chewy granola bars and soooo good for you. I make up a batch, cut them into bars and pop them in lunches and diaper bags. Super easy, super yummy!


Ingredients:

2 1/2 cups old fashioned oats
1 cup whole wheat pastry flour (or unbleached)
1/2 teaspoon baking soda
1/4 teaspoon salt
2/3 cup raisins or another chopped dried fruit
1/2 cup chopped walnuts
1 cup packed brown sugar
1/2 cup light maple syrup
3 tablespoons peanut butter
2 egg whites
1/2 cup chocolate chips

1. Ok, this is super easy, you will have these made in no time! Ready, set, go!
Combine oats, flour, soda and salt. Add in your dried fruit and walnuts.
2. In another bowl beat together sugar, syrup, peanut butter and egg whites. After nice and smooth pour into dry ingredients. Add those chocolate chips now!
3. Spread into a foil lined and sprayed 9x13 baking dish. Pat down. Sprinkle with 1/8 teaspoon salt. I know it sounds weird but it is a must!
4. Bake at 350 for 20-25 minutes. Cool all the way and then cut into bars.

* I melt a handful of chocolate chips in a zip lock bag and snip the end off to drizzle a bit of yummy chocolate on top.
* When I cut my bars I trimmed all the edges off first (they tend to be a bit harder becuase they are on the edge of the pan) So snack on those and then after cutting all your bars wrap them individually in saran wrap to stay fresh. Put the in the freezer then take one out when every you need one.
* You can add dried cranberries, apples, apricots, blueberries, anything!

Thursday, May 12, 2011

Pastitsio {greek pasta}

This pasta dish is creamy and full of flavor. This dinner comes together in no time and I love the hint of cinnamon, it really stands out to make this meal wonderful!


Ingredients:

1 package {7oz} uncooked short pasta
1 lb. ground turkey
1 medium onion, chopped
1 garlic clove, minced
1 can {8oz.} tomato sauce
1 teaspoon salt, divided
1/4 teaspoon dried oregano
1/8 teaspoon pepper
1/4 teaspoon cinnamon
1/2 cup grated Parmesan cheese, divided
3 teaspoons butter
3 teaspoons flour
1-1/2 cups low-fat/fat free milk
1 egg, beaten

1. Cook pasta for 8-10 minutes. While pasta is cooking, cook the ground turkey, onion, and garlic over medium heat until meat is cooked through. Stir in the tomato sauce, 1/2 teaspoon salt, oregano, pepper and cinnamon.
2.Drain the pasta. Place half the noodles into a greased 9x9 pan. Sprinkle with 1/4 cup cheese. Next layer with meat mixture and the remaining macaroni. Set aside.
3.In a small sauce pan, melt the butter and stir in the flour and remaining salt until smooth. Gradually add the milk. Bring to a boil, cook and stir for 2 minutes or until thickened.
4. Remove from the heat. Stir a small amount of the hot mixture into the beaten egg. Pour the egg mixture into the sauce pan stirring constantly. Bring to a gentle boil. Cook and stir for 2 minutes. Remove form heat and add remaining cheese.Pour sauce over the macaroni.
5. Bake uncovered at 350 for 30 minutes or until golden brown. Let stand 10 minutes before serving.

* Serve this meal with a fresh green salad or steamed broccoli or green beans. Add some toasted garlic bread and you are ready!

Tuesday, May 3, 2011

Creamy Black Bean Soup

There have still been some chilly days here, so I thought I could squeeze in another soup dish before summer. I am so glad because this soup was sooooo good! It has great flavor and great consistency. You have to give this a try! Super easy and low in fat too! It's another great recipe from Our Best Bites.


1 T olive oil
4 large cloves garlic, roughly chopped
3/4 C diced carrots (about 2 med carrots)
3/4 C diced celery (about 2 ribs)
1 C diced onion (about 1 sm-med onion)
2 cans black beans, rinsed and drained
1 3.5oz can green chilies
2 cans low-sodium beef broth
1 t kosher salt
1/8 tsp black pepper
1/2 t chili powder
1/4 t cumin
1/2 t dry oregano leaves
1 bay leaf

extras: sour cream, tortilla chips, grated cheese, chopped cilantro, etc

1.Place a large stock pot on the stove-top and set to medium-high heat. When pan is warm, add olive oil. Add carrots, celery, onion, and garlic and saute 4-5 minutes.

2.Add in the black beans, chilies, and beef broth. Stir to combine and then add the salt, pepper, chili powder, cumin, oregano, and bay leaf.

3.Simmer uncovered for about 20-25 minutes or until carrots are tender.Remove from heat. Remove bay leaf from soup.

4.Place soup in a blender. Place lid on blender, but remove the stopper in the lid to let heat escape. Place a paper towel over the hole to avoid splatters. Puree soup until completely smooth. Optionally you could pulse until a semi-chunky soup is achieved. Squeeze in the juice from one lime and pulse to combine.

5.Ladle into bowls and top with desired toppings. Serve with extra lime wedges. Makes about 8 cups soup.

Serve with buttered bread or warm tortillas! YUM!!

Tuesday, April 26, 2011

Indoor Smores'

These yummy bars come together in no time and are perfect for snacking or dessert. Everyone will love this chocolate treat filled with marshmallow goodness!


Ingredients

8 cups Golden Grahams® cereal
5 cups miniature marshmallows
1 1/2 cups milk chocolate chips
1/4 cup light corn syrup
4 tablespoons butter or margarine
1 teaspoon vanilla
1 1/2 cups miniature marshmallows

1.Into large bowl, measure cereal. Butter 13x9-inch pan.(I lined mine with foil and sprayed it with non-stick spray so I could lift and cut into bars easier) In large microwavable bowl, microwave 5 cups marshmallows, the chocolate chips, corn syrup and butter uncovered on High 2 minutes to 3 minutes 30 seconds, stirring after every minute, until melted and smooth when stirred. Stir in vanilla.
2.Pour over cereal; quickly toss until completely coated. Stir in 1 1/2 cups marshmallows.
3.Press mixture evenly in pan, using buttered back of spoon. Let stand uncovered at least 1 hour, or refrigerate if you prefer a firmer bar. Store covered at room temperature up to 2 days.
Enjoy!

Sunday, April 17, 2011

Cheese and Sausage Stuffed Shells

This recipe is a favorite around here! It is a great meal to make early in the day and pop in the oven right before dinner. Perfect for any weekday meal but fancy enough to serve to company!


Ingredients:

1 box jumbo shells
1/2 lb. turkey sausage {sweet or spicy}
1 jar of your favorite pasta sauce
2 cloves of garlic, chopped
1/2 cup chopped onion
1 (16-ounce) container fat free ricotta cheese
2 eggs, beaten
2 cups shredded mozzarella cheese
½ cup grated Parmesan cheese
2 tablespoons chopped parsley
1 teaspoon seasoned salt
¼ teaspoon pepper

1. First, get a big pot of salted water boiling. When it is at a rolling boil, add a drizzle of olive oil {to keep the shells form sticking} and toss in your shells. I do the whole box because some break while cooking or filling so it is good to have extras. Let them cook for about 8 minutes. Drain and remove carefully and let them cool on a cookie sheet lined with wax paper.
2. Ok, next in a skillet cook up your sausage. When it is cooked through move the sausage onto a plate or bowl then return the pan to the stove.
3. Into the pan add a drizzle of olive oil and add in the onions and garlic. Cook over medium heat for a few minutes until onions are translucent. Pour your sauce into the pan and stir the onions and garlic into the sauce. Turn heat down to low and let that hang out.
4. In another bowl combine the ricotta cheese, eggs, 1 cup of cheese, Parmesan cheese, parsley, season salt and pepper. Add in the sausage and combine.
5. Time to assemble. Ok, pour enough sauce into your 9x13 to coat the bottom. Next using a spoon, fill your shells with the cheese/sausage mixture. Place in your baking dish. Your pan should look like this:

Top your shells with remaining sauce, cover with foil and place in a 350 oven for 25 minutes. After 25 minutes, top with the remaining cup of cheese {or more if you like} and broil for a couple of minutes until the cheese is golden and bubbly. Dig in!


* A fresh green salad and garlic bread is perfect with this meal. This recipe makes a lot and is great for leftovers.
* For meat free stuffed shells, just omit the sausage and replace it with a cup of cheese. So, your filling will of 2 cups of cheese and 1 cup for the top.

Saturday, April 2, 2011

New Arrival!

Well after 9 long months our sweet baby Olivia is here!! I am beyond thrilled and so happy to have another girl, now we have 3!! I have been saving up pictures and recipes to share so hopefully I won't fall behind, but I know that after we get back into the swing of things this blog will be hoppin'! So here is a pic of the cutest babe and a quick recipe to make on the next sunny day you have!!


Cranberry-Orange Chicken Salad Sammies(from Our Best Bites)


Ingredients:

2 cups cooked chicken, chopped into bite size
1 cup celery
1/3 cup chopped green onions
Zest of 1 medium orange
1/2 cup craisens
1/2 cup light mayo
1 teaspoon spicy brown mustard or coarse grain mustard
2 tablespoons jellied cranberry sauce
1/2 teaspoon salt
1/4 teaspoon pepper
1/2 cup chopped pecans or walnuts
Croissants or rolls
lettuce leaves

1. In a medium bowl, combine chicken, celery, green onions, orange zest and craisins.
2. In a separate, smaller bowl whisk together mayo, mustard, cranberry sauce, salt and black pepper. Add the chicken mixture and toss to fully combine. *This salad is best if refrigerated for several hours before serving.
3. Just before serving, add the toasted pecans/walnuts. Serve on toasted buns (with a touch more mayo if desired)and with a leaf of lettuce.

* Combine this with fruit salad and some veggies for dipping and you are set!

Wednesday, March 16, 2011

Orange Rolls

These are a great variation of cinnamon rolls and my husband always requests them. The orange flavor is light and clean and is the perfect dessert on a Sunday afternoon!


Ingredients:

1 recipe for rolls *(you can use your favorite, or a frozen bread dough from the store or here is my favorite that I do in the bread maker but can also be done by hand)
1/4 cup tub butter (i love Brummel and brown)
zest from 2 good sized oranges
1 cup sugar

Glaze:
2 tablespoons tub butter
1-1 1/2 cups powdered sugar
1-2 tablespoons orange juice(just juice the oranges that you zested)

1. Prepare your dough. Let it rise and then roll out into a large square about 1/4 inch thick. Mix the tub butter, zest, and sugar together with beaters. Beating the mixture will make it light and creamy, perfect for spreading. *Now everyones butter is a bit different so if the mixture is a bit stiff add a drop or two of orange juice. If it seems too runny add a bit more sugar to get a good spreading consistency.
2. Spread the mixture all over your dough but leave a clean 1/4 inch space around the dough because when you roll these babies the filling will spread.
3. Start rolling and when you have rolled the dough into a log, pinch the end to the rolled dough to seal the rolls.
4. Now I make 6 big rolls but you can make these what ever size or quantity that you want. Find the center of your dough and score it with a knife. (I always use floss to cut my rolls, it is so much easier. I just keep a container of floss in my utensil drawer for times just like these :) Ok, Cut about an inch off the log to start with a nice clean even roll. Save the little bit you cut off and put it to the side. Now score the rest of your rolls with your knife so they are all the same size. Remember to leave about an inch to be cut off on the end too, for even rolls. Grab your floss and cut each roll and place it into a 9X13 greased pan.
5. Place your rolls into a warm oven or in a warm spot to rise, about 35-45 minutes.
6. Once they have risen, bake them for 10 minutes at 365, then cover them with foil and cook for 6-8 more minutes. You want the center to be cooked so you don't have a doughy roll.
7. While they are cooking, mix all your glaze ingredients together to form a nice spreading consistency and as soon as the rolls come out of the oven frost those babies! The glaze will melt inside and out and keep them nice and soft. Let them cool for a few minutes and then eat and enjoy with a glass of milk!!

Wednesday, March 9, 2011

Hawaiian Chicken and Rice

This was a perfect "tired of winter need a yummy summer dish". It hit the spot. The chicken is juicy and the pineapple and sauce are sweet and warm. Yum! You and your family will love this!


Ingredients:

1/2 cup flour
1 teaspoon salt
1/4 teaspoon pepper
6 boneless chicken breasts
2 tablespoons oil
1 cup sugar
2 tablespoons cornstarch
1 teaspoon chicken bouillon granules(or one cube)
1/4 teaspoon ground ginger
1 can sliced or chunk pineapple
1/2 cup cider or white vinegar
1 tablespoon soy sauce
hot cooked rice

1. In a large resealable plastic bag, combine the flour, salt and pepper. Add the chicken, one piece at a time and shake to coat. In a skillet, heat to medium high and brown the chicken in oil. Transfer to a greased 9x13 baking dish.
2. In a small sauce pan, combine the sugar, cornstarch, bouillon and ginger. Drain the pineapple into a 2 cup measuring cup. Set pineapple aside. Add enough water to the pineapple juice to measure 1 1/4 cups. Stir in vinegar and soy sauce. Gradually whisk into sugar mixture. Bring to a boil and cook and stir for 2 minutes or until thickened.
3. Place the pineapple all around and over the chicken. Pour the sauce all over the chicken and pineapple. Bake uncovered at 350 for 20-30 minutes or until meat is fully cooked. While your chiken is cooking, cook that rice!
4. Slice chicken and place on top of cooked rice and pour pineapple and sauce over top. Yum!!

* I added some steamed carrots tossed with a bit of butter and salt to the side of this dish and it was perfect!!

Thursday, February 24, 2011

Turkey Gravy and Mashed Potatoes

This meal is super easy and something that my grandma taught me how to make back in high school. It is a great comfort food dinner and perfect for a chilly day.


Ingredients:

1 lb. ground turkey (or lean ground beef)
1/2 small onion, chopped
2-3 tablespoons flour
low fat/fat free milk
salt and pepper
garlic powder
5-6 russet potatoes, peeled and chopped

1. Get a big pot of salted water boiling and toss those potatoes in. While they are cooking you can make the gravy.
2. In a skillet over medium heat add a bit of olive oil and add the ground meat and onions. Cook until meat is cooked through and onions are soft and translucent. Sprinkle with garlic powder, salt and pepper. (you will taste for flavor later too...)
3. Next, sprinkle the flour over your meat mixture and stir with a wooden spoon. You want the mixture to absorb all the flour and make a paste like texture. Once the flour has been added, you now add a splash of milk and stir. You continue to add milk and stir until you reach the consistency you like. *Kinda like the gravy on biscuits thickness*. Go ahead and taste for flavor. Add more salt and even garlic powder to enhance flavor. Let it sit on low while you drain and mash your potatoes. (You can continue to add milk if it thickens up on you while you are making the potatoes)
4. Flavor the potatoes like you would regular mashed potatoes. Serve by scooping potatoes onto each plate and pouring your gravy right on top. Garnish with green onions if you want.

* I serve this with a dark green veggie like broccoli, green beans, or a salad. Pair it with garlic bread or muffins and you are set!